Love summertime? Don't like using the oven all the time? Want something you can make easily using only 5 ingredients? Yep -- these no bake Oreo bars are right up your alley.
There was a Costco-sized box of Oreos sitting in our teacher workroom for days. Nobody was taking them, but I'm not scurred. I took three sleeves of Oreos home like they were some kind of wounded animal that needed saving. And voila! We have a dessert tonight.
Enjoy!
Want to Save This Recipe?
Enter your email below, and I'll send it to you. Plus, you'll get delicious new recipes from me!
By submitting this form, you consent to receive emails from Worn Slap Out
Ingredients
- Approximately 30 Oreos (possibly more if you want to garnish the top with Oreos, too)
- 6 tbs melted butter, divided
- 4 cups mini marshmallows
- 6 oz. cream cheese, room temperature
- ½ cup chocolate chips
Directions
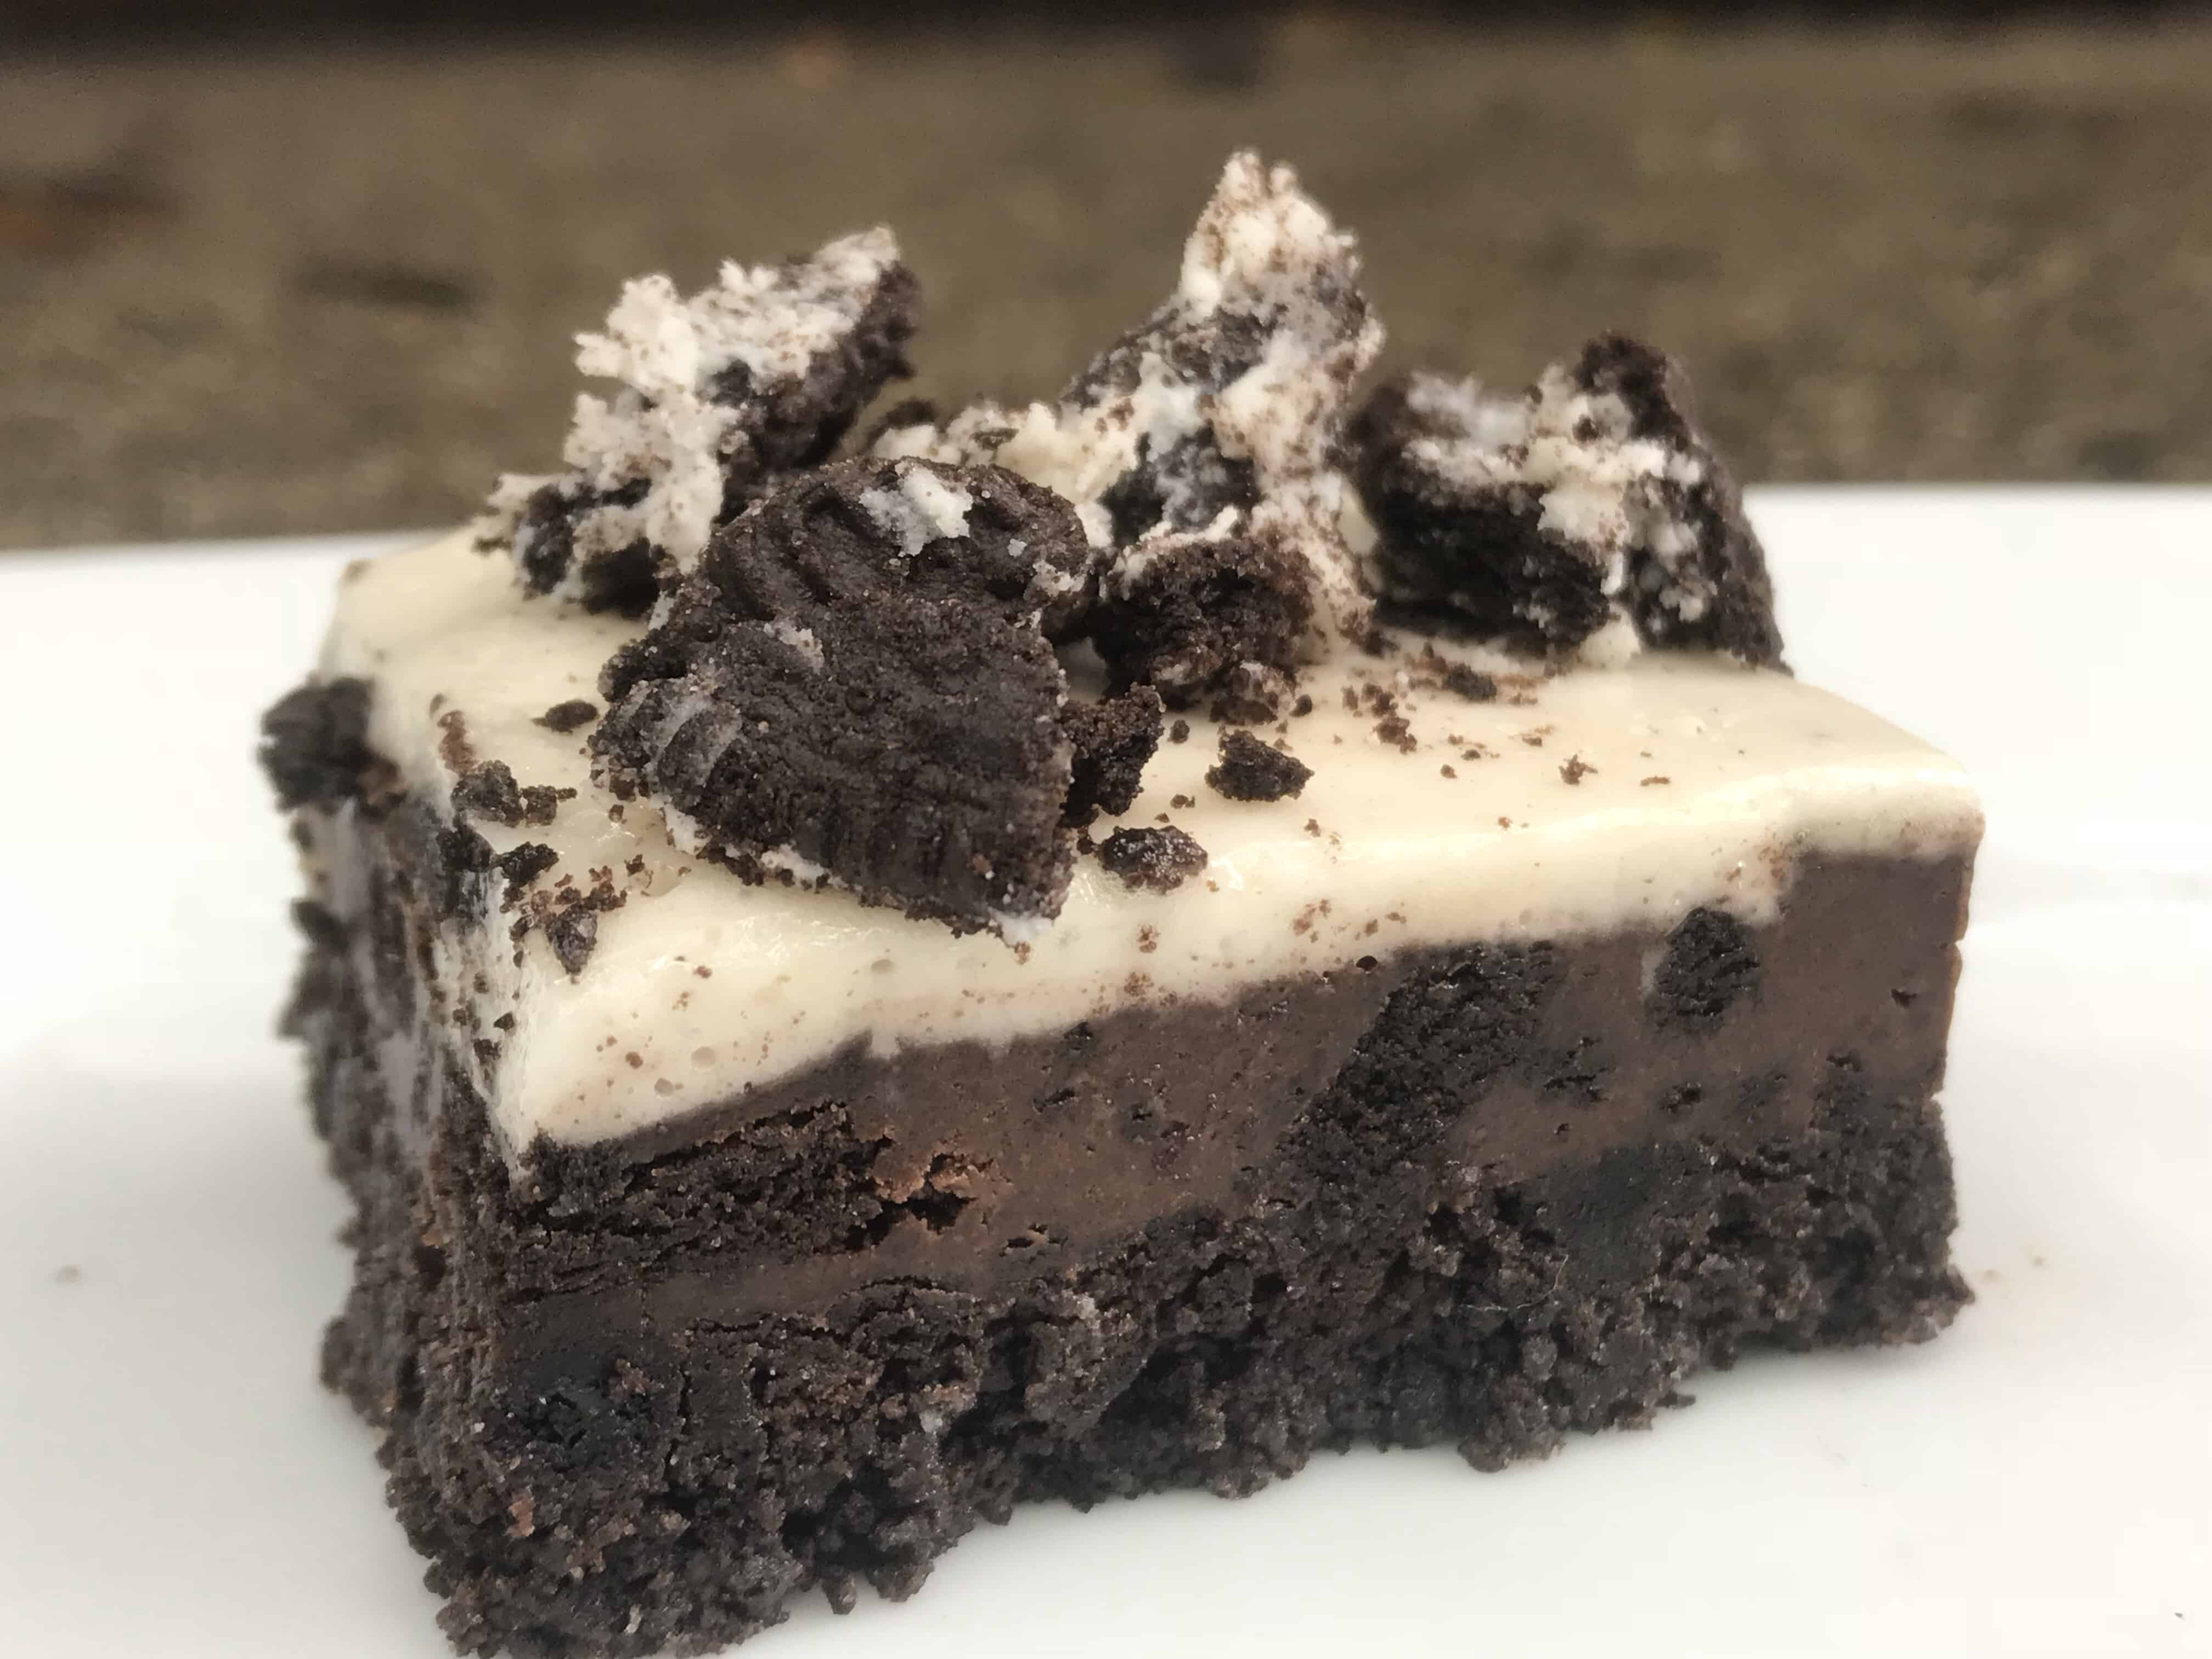
- Combine approximately 18-20 Oreos and 4 tablespoon of melted butter in food processor, pulse until combined into a nice crust. Press into a greased 8x8 baking pan lined with parchment paper to form crust. Place in freezer while you do the next step.
- Meanwhile, process about 10 more Oreos with 6 oz. cream cheese (about ¾ of a normal block of cream cheese). Transfer to a small bowl.
- Melt ½ c chocolate chips in a microwave and stir into Oreo mixture. Hand crush about 6 more Oreos and stir them in mixture.
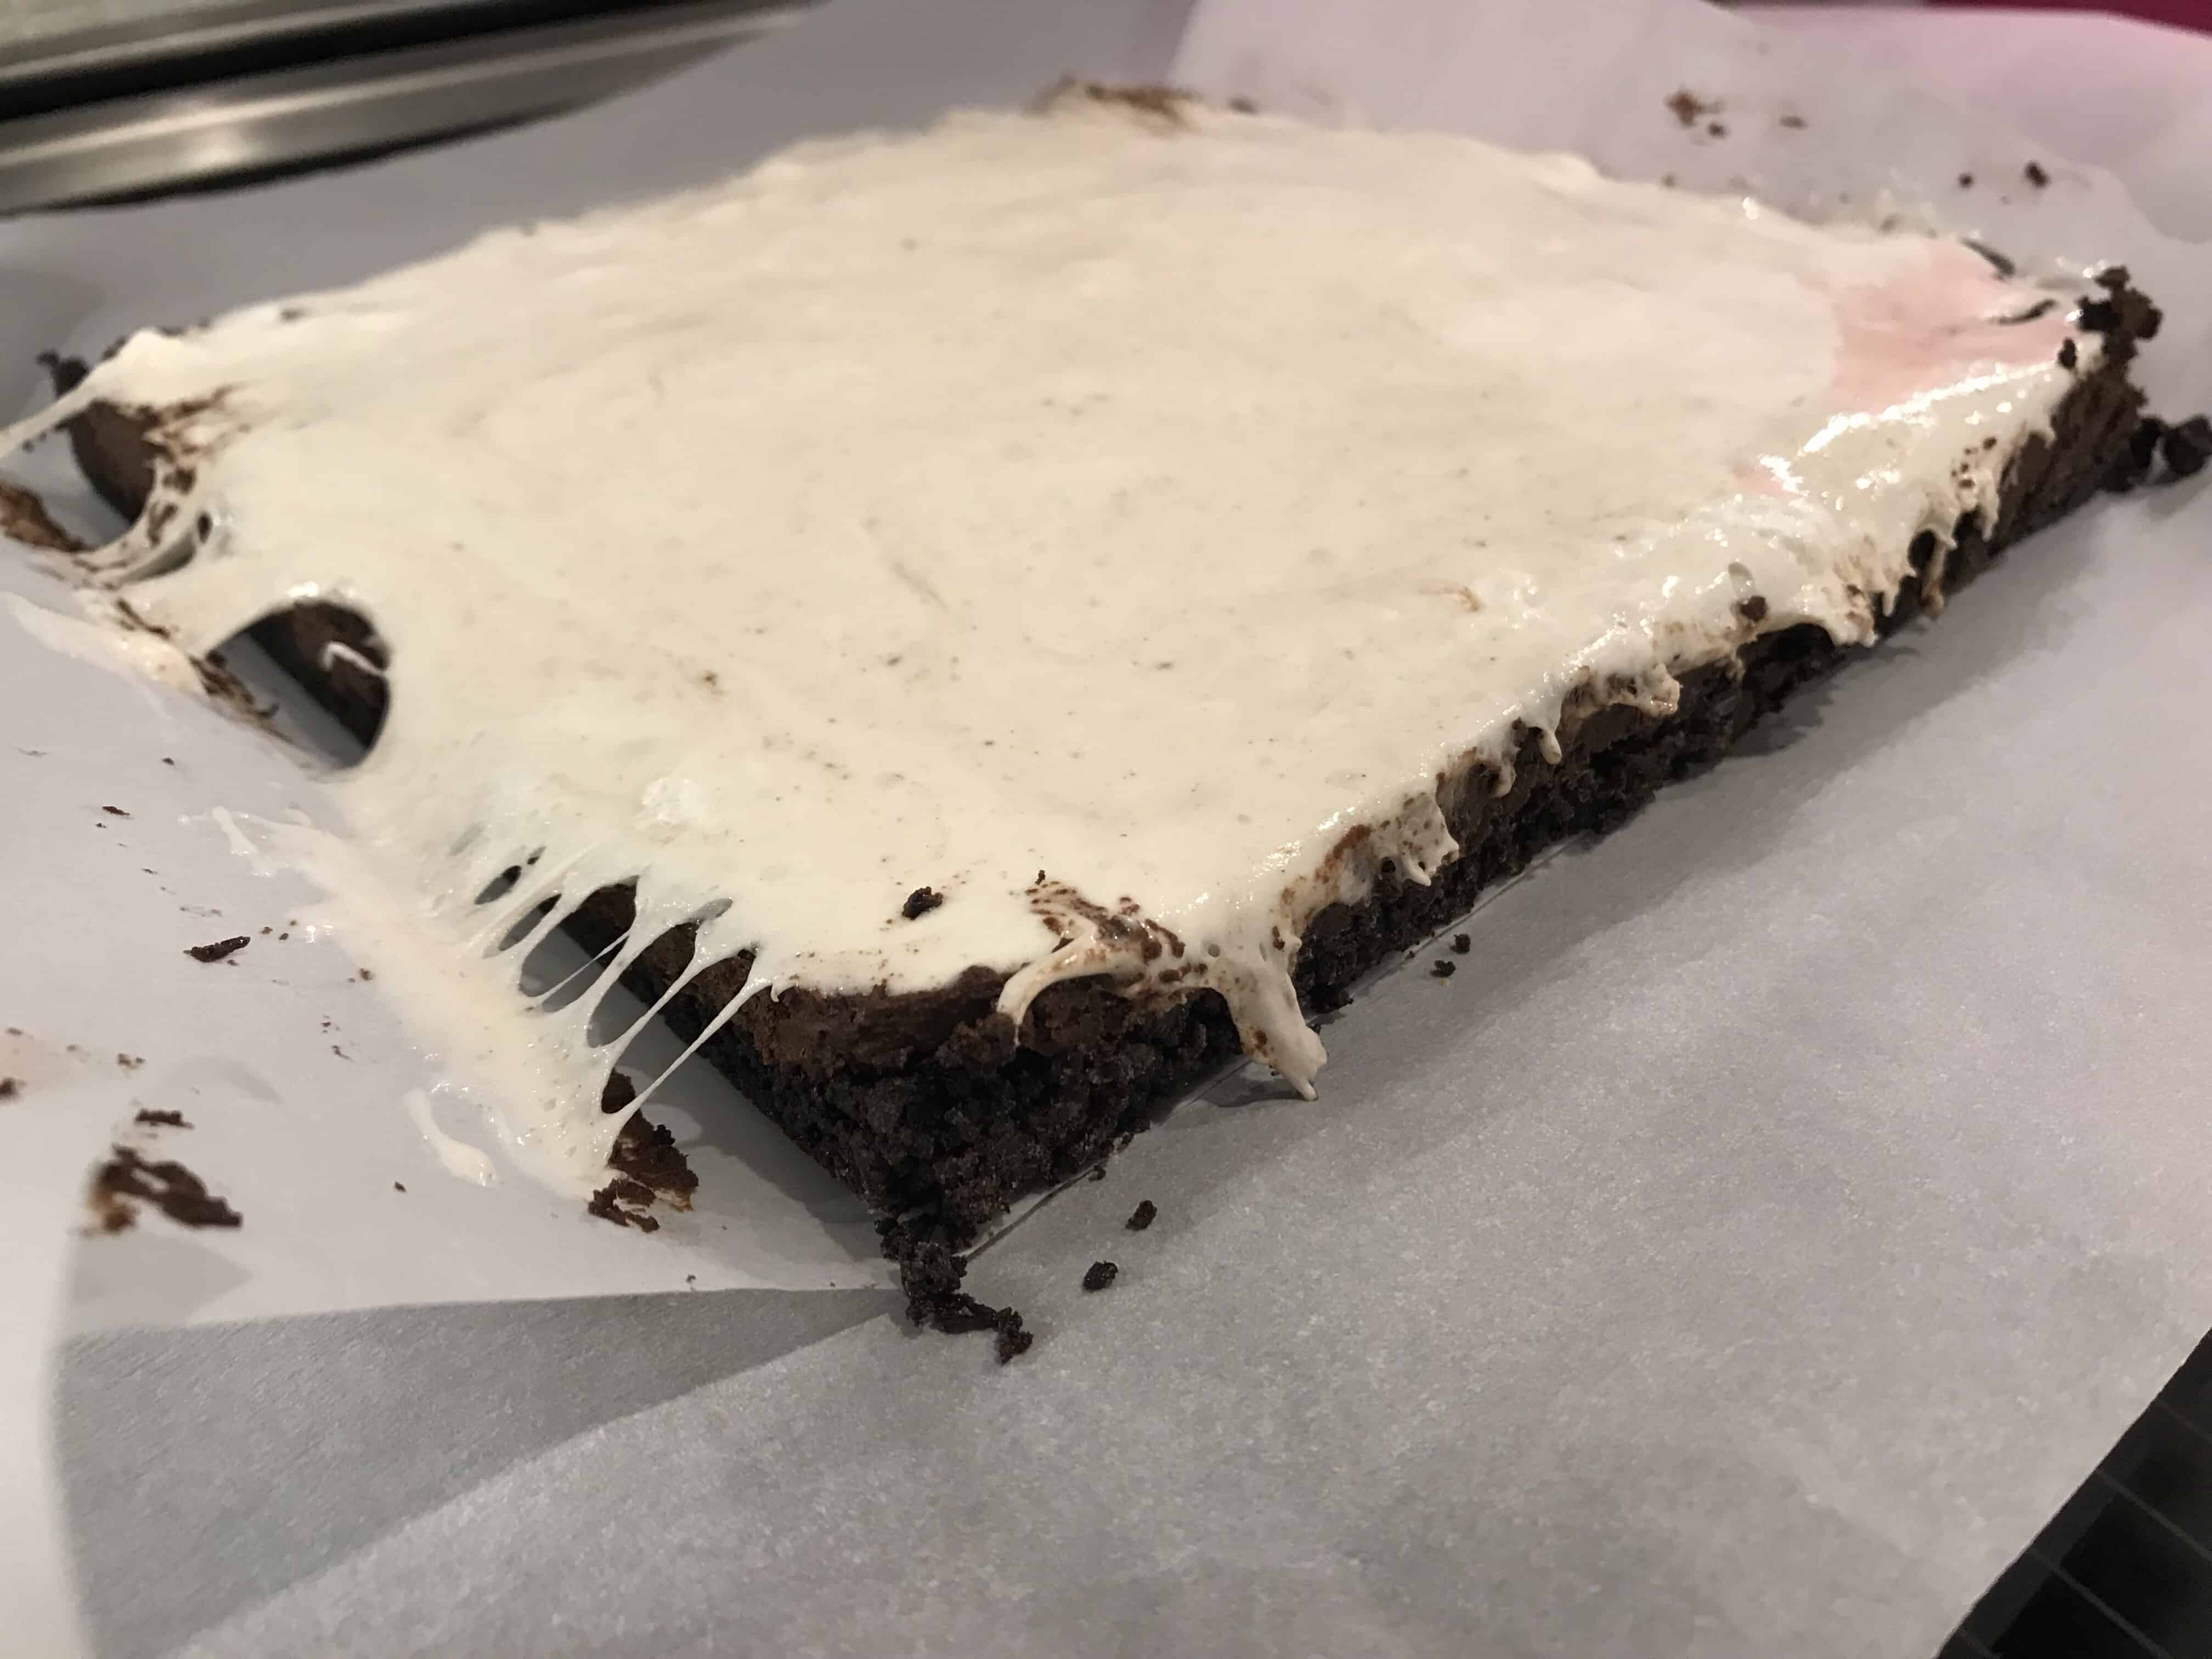
- Take your crust out of the freezer. Spread Oreo mixture evenly over crust. Stick back in the freezer for about 10 minutes.
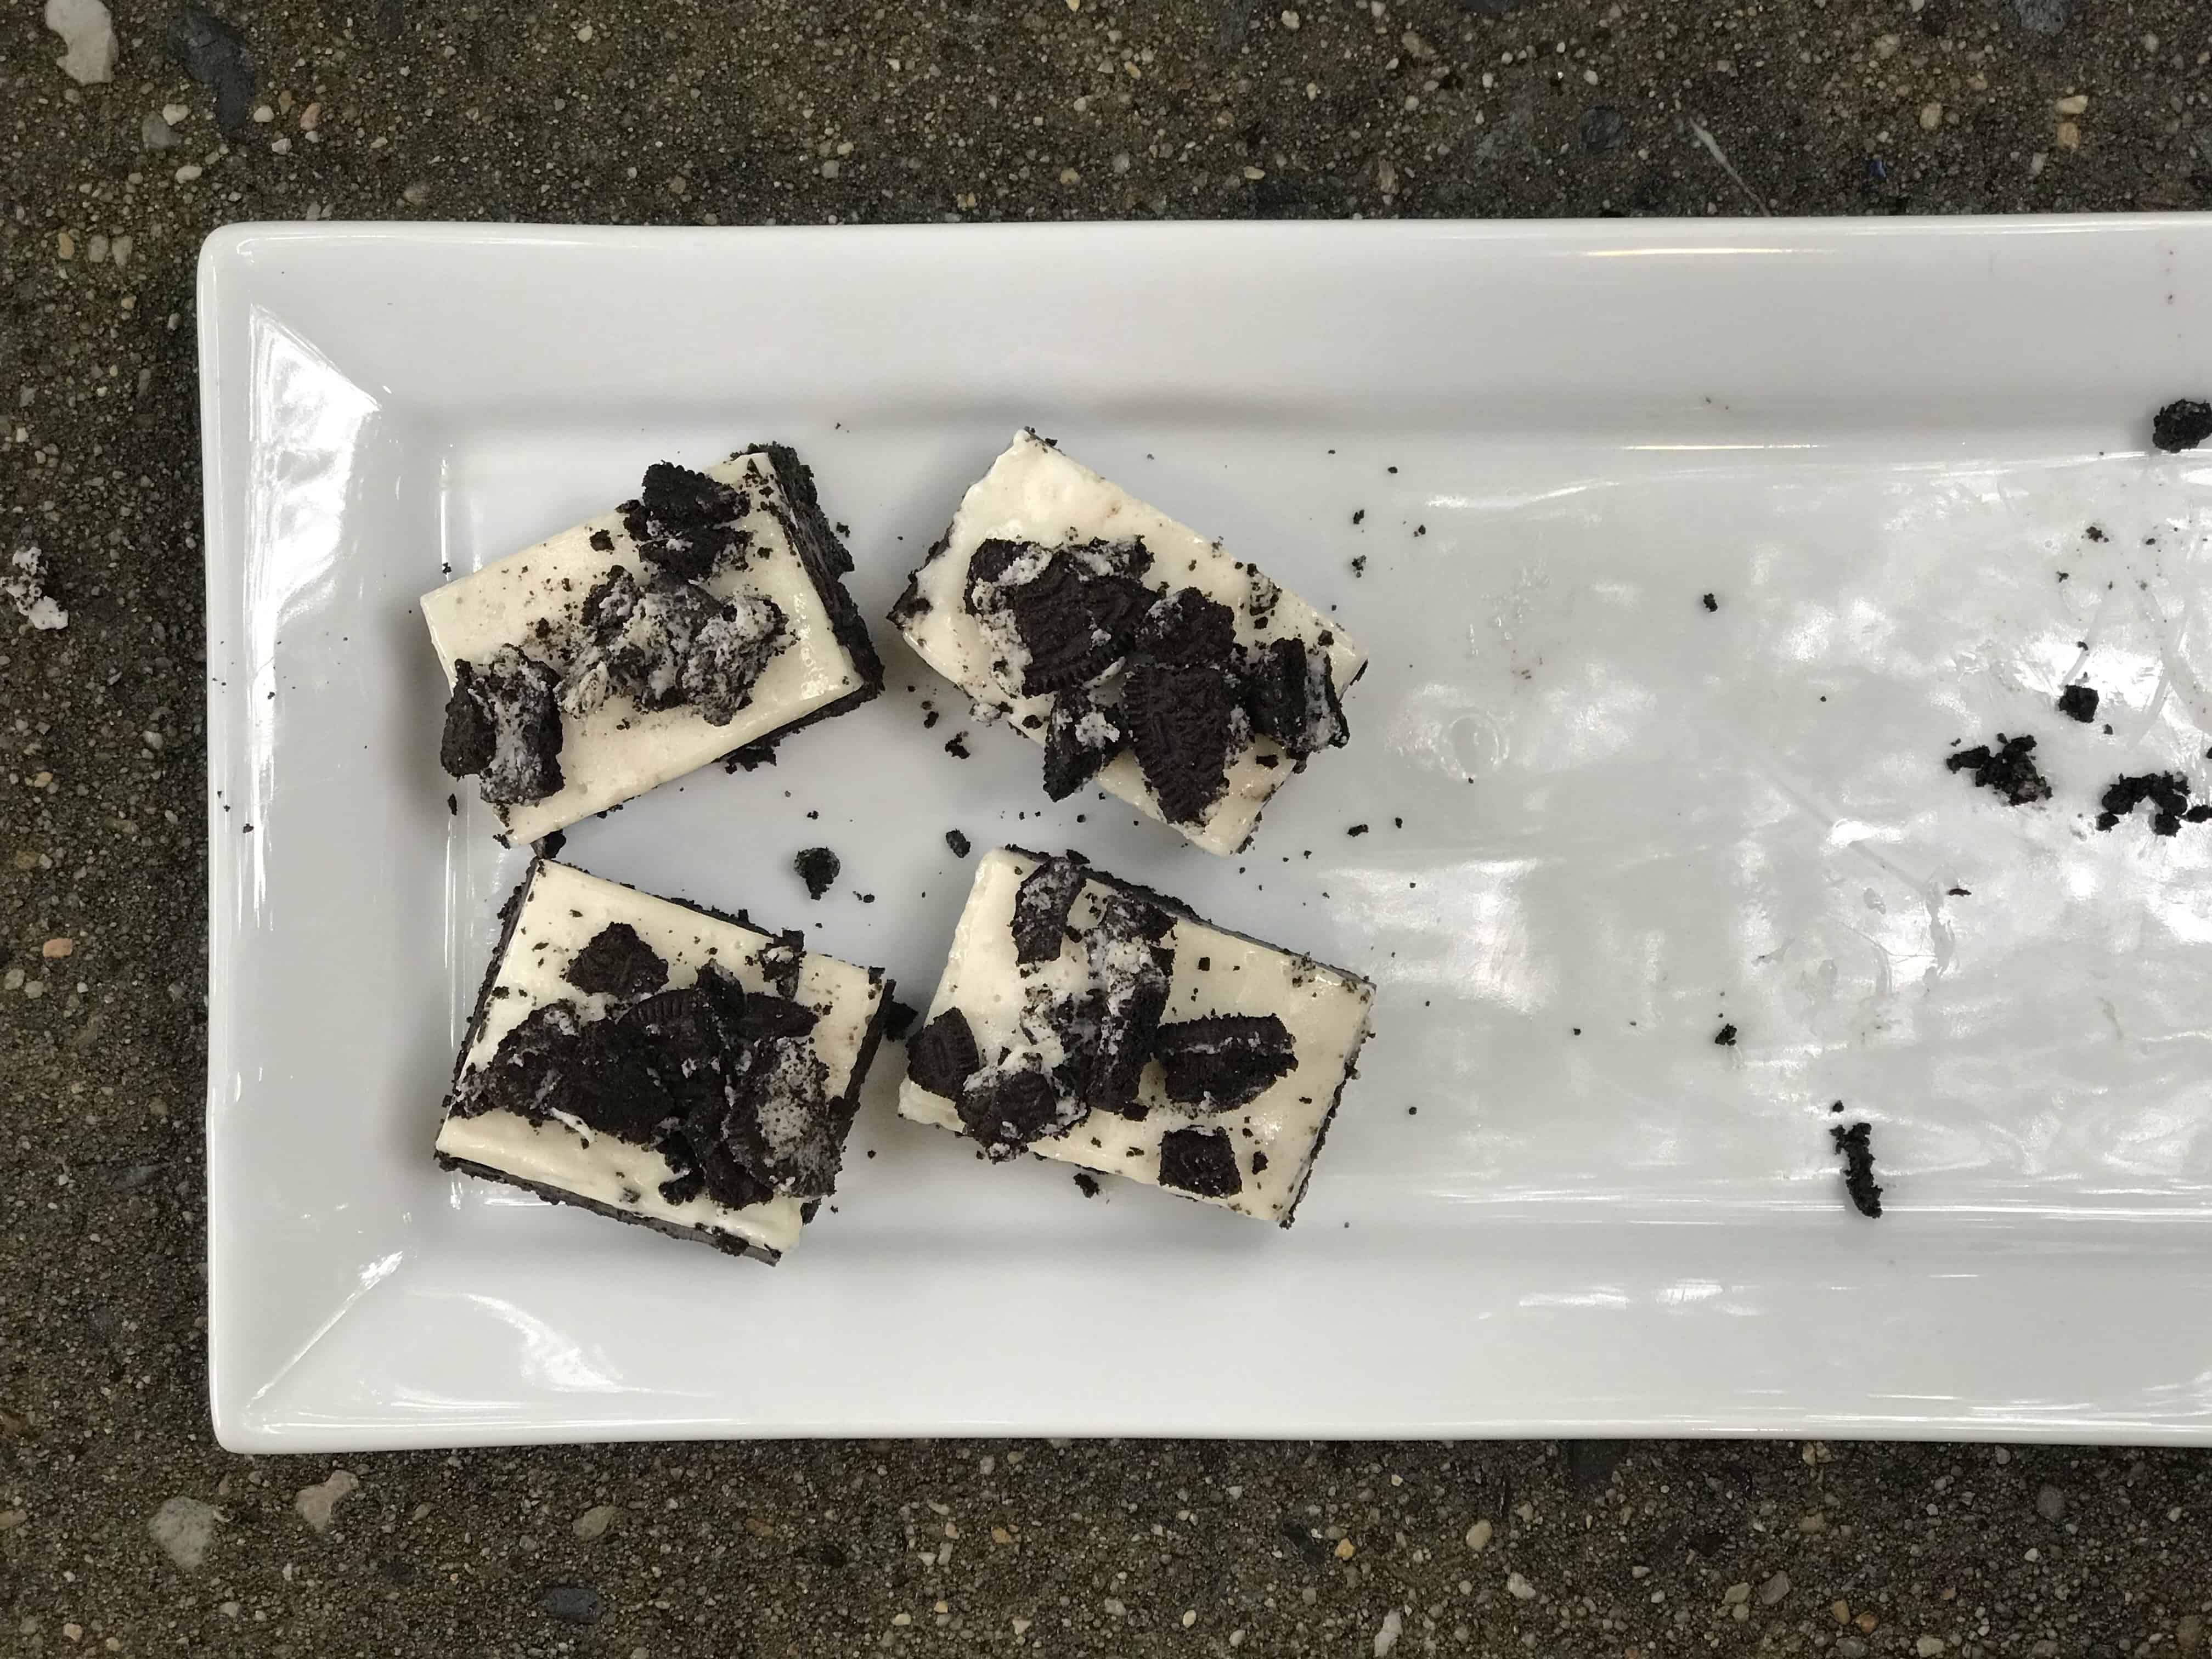
- Meanwhile, melt 4 cups of mini marshmallows with 2 tablespoon butter in microwave. Stir to combine. Spread over top of Oreo mixture using a spatula. (I use the same bowl I melted the chocolate in to melt my marshmallows. The marshmallows won't be perfectly white but it saves me from washing another bowl). Top with more Oreo crumbs, if desired.
- Put in the refrigerator until you're ready to cut and eat.
Side notes: I kept putting the crust in the freezer or refrigerator so it was easier to spread. You could skip these steps and put them in the refrigerator at the end for about 30 minutes. It'll be much easier to cut if the bars are cold. Make sure to also butter or grease a sharp knife to cut into whatever size bars your heart desires.
I'll take three please.
Connor says
I like Oreos but I love this! I am not a very good chef so this was simple and so yummy! 1000/10
Kathryn says
Thank you! And I KNOW you're a better chef than you think you are!