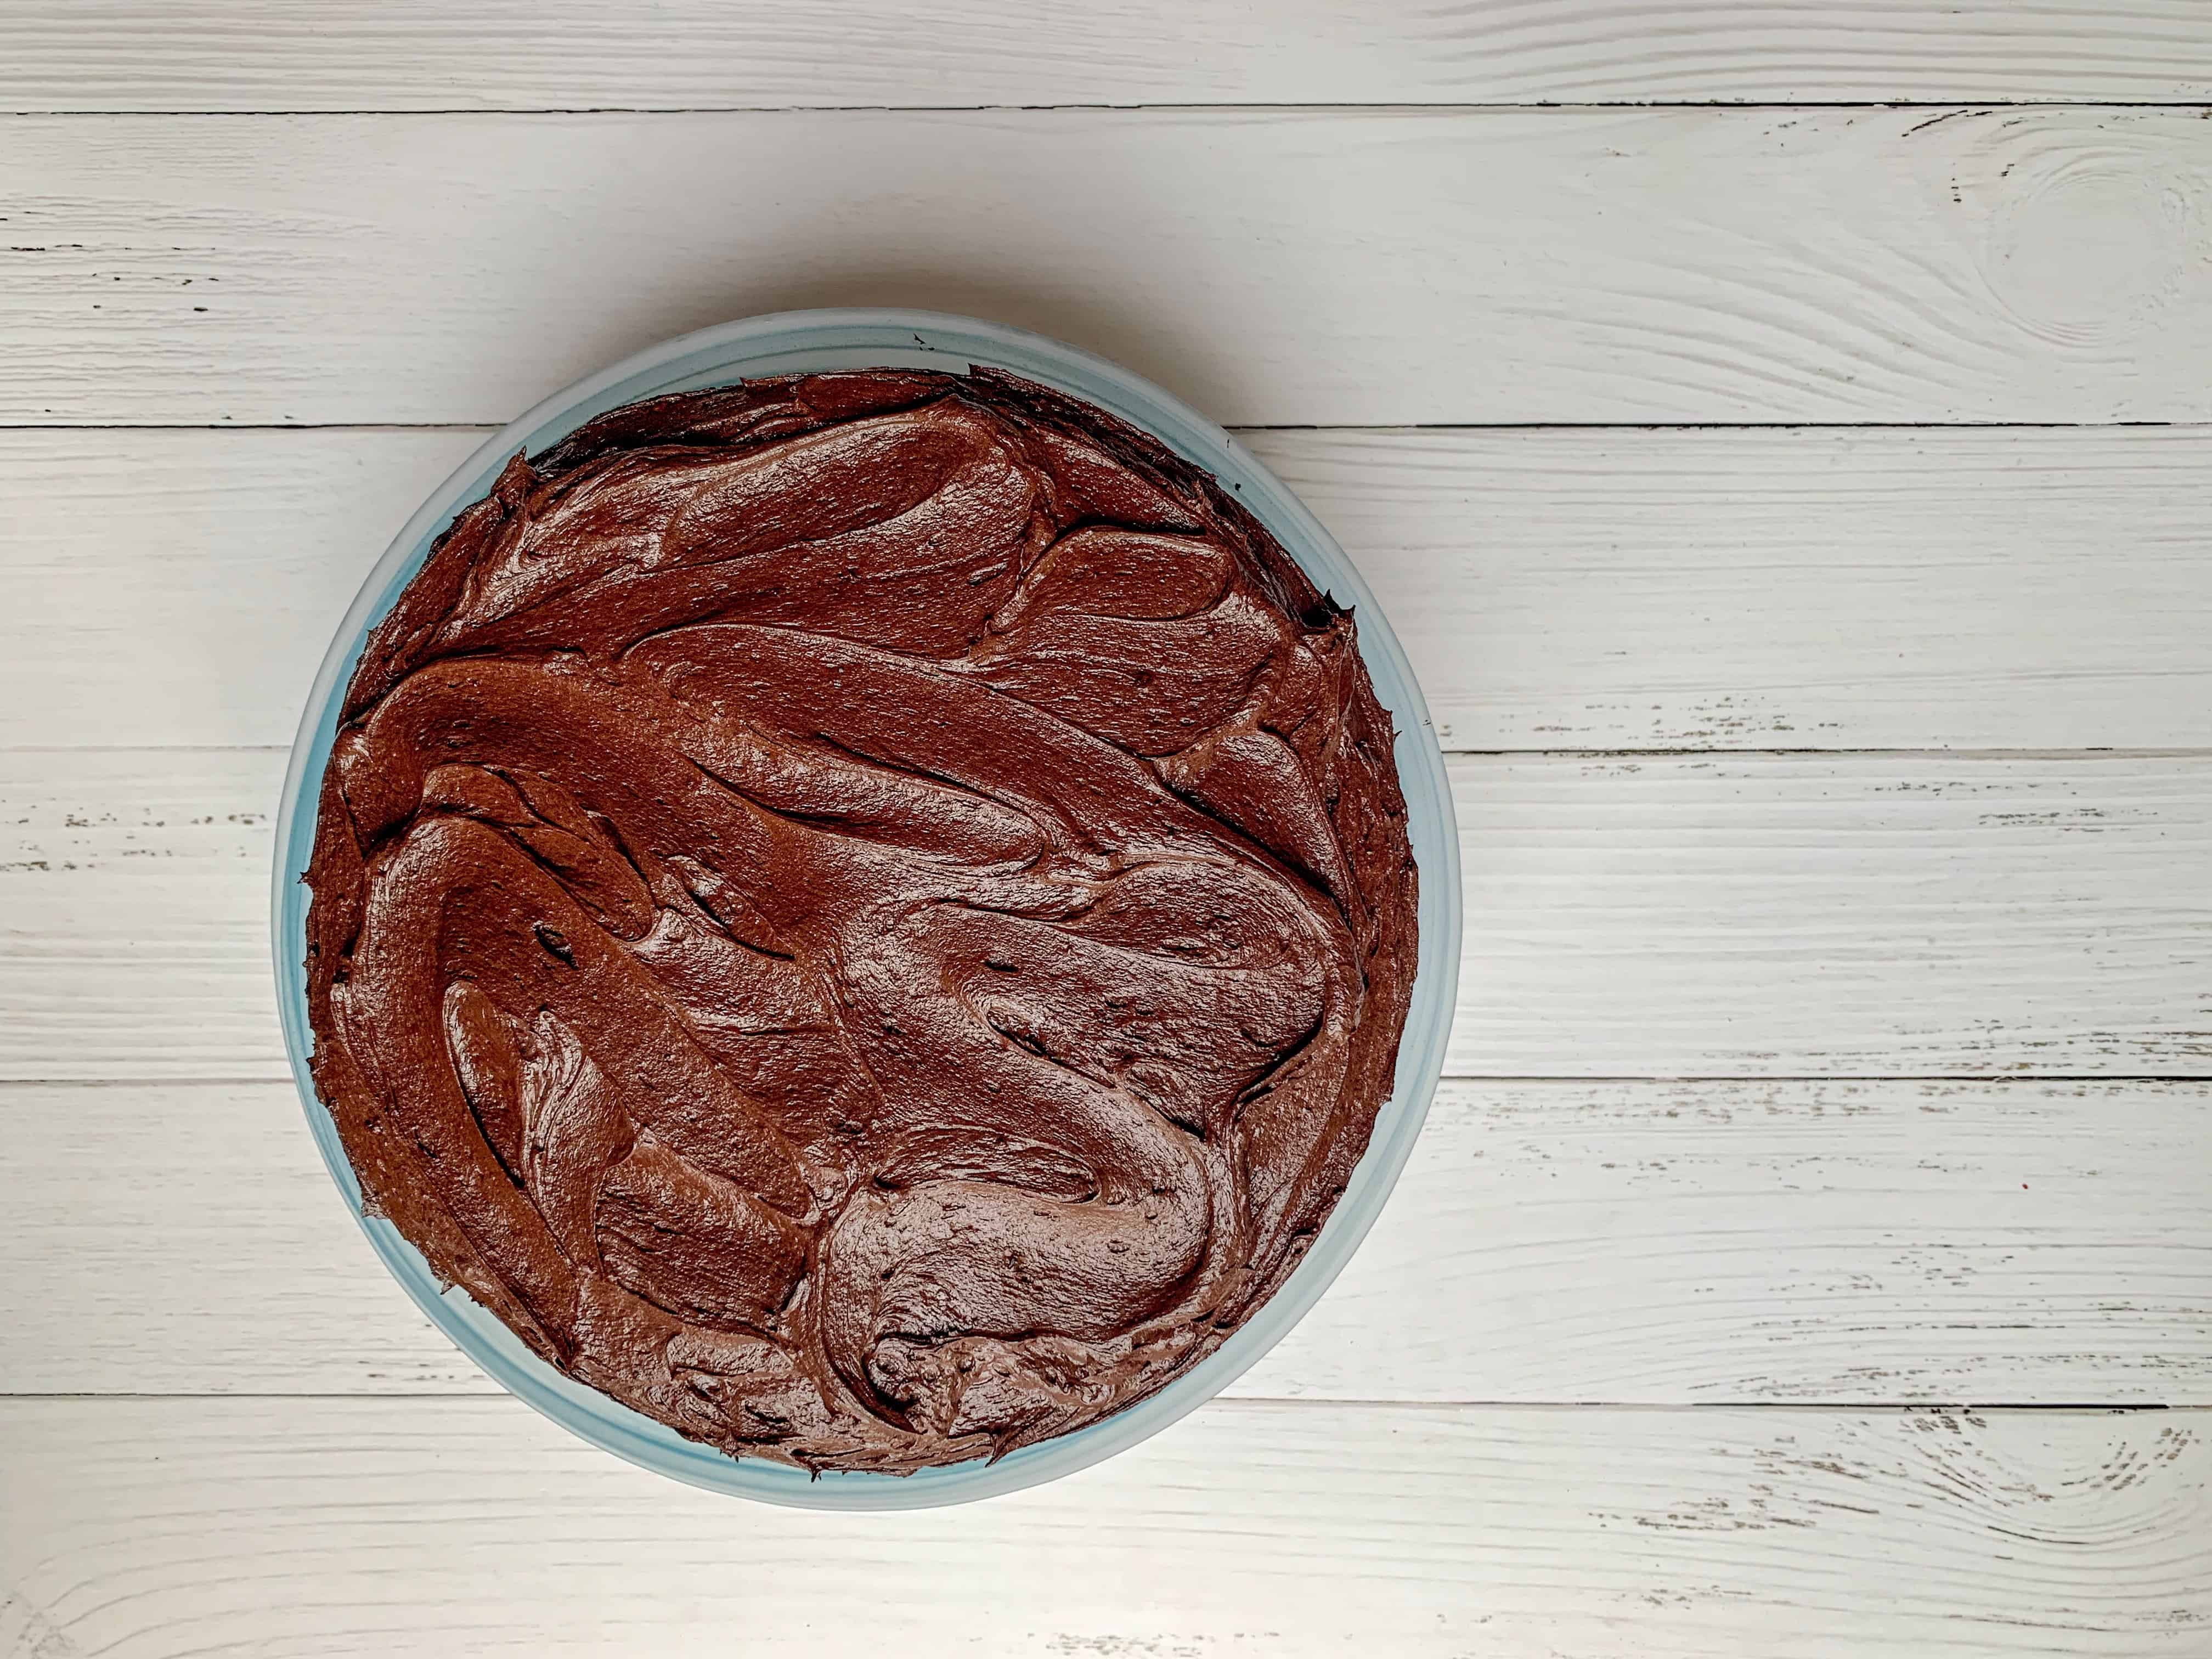
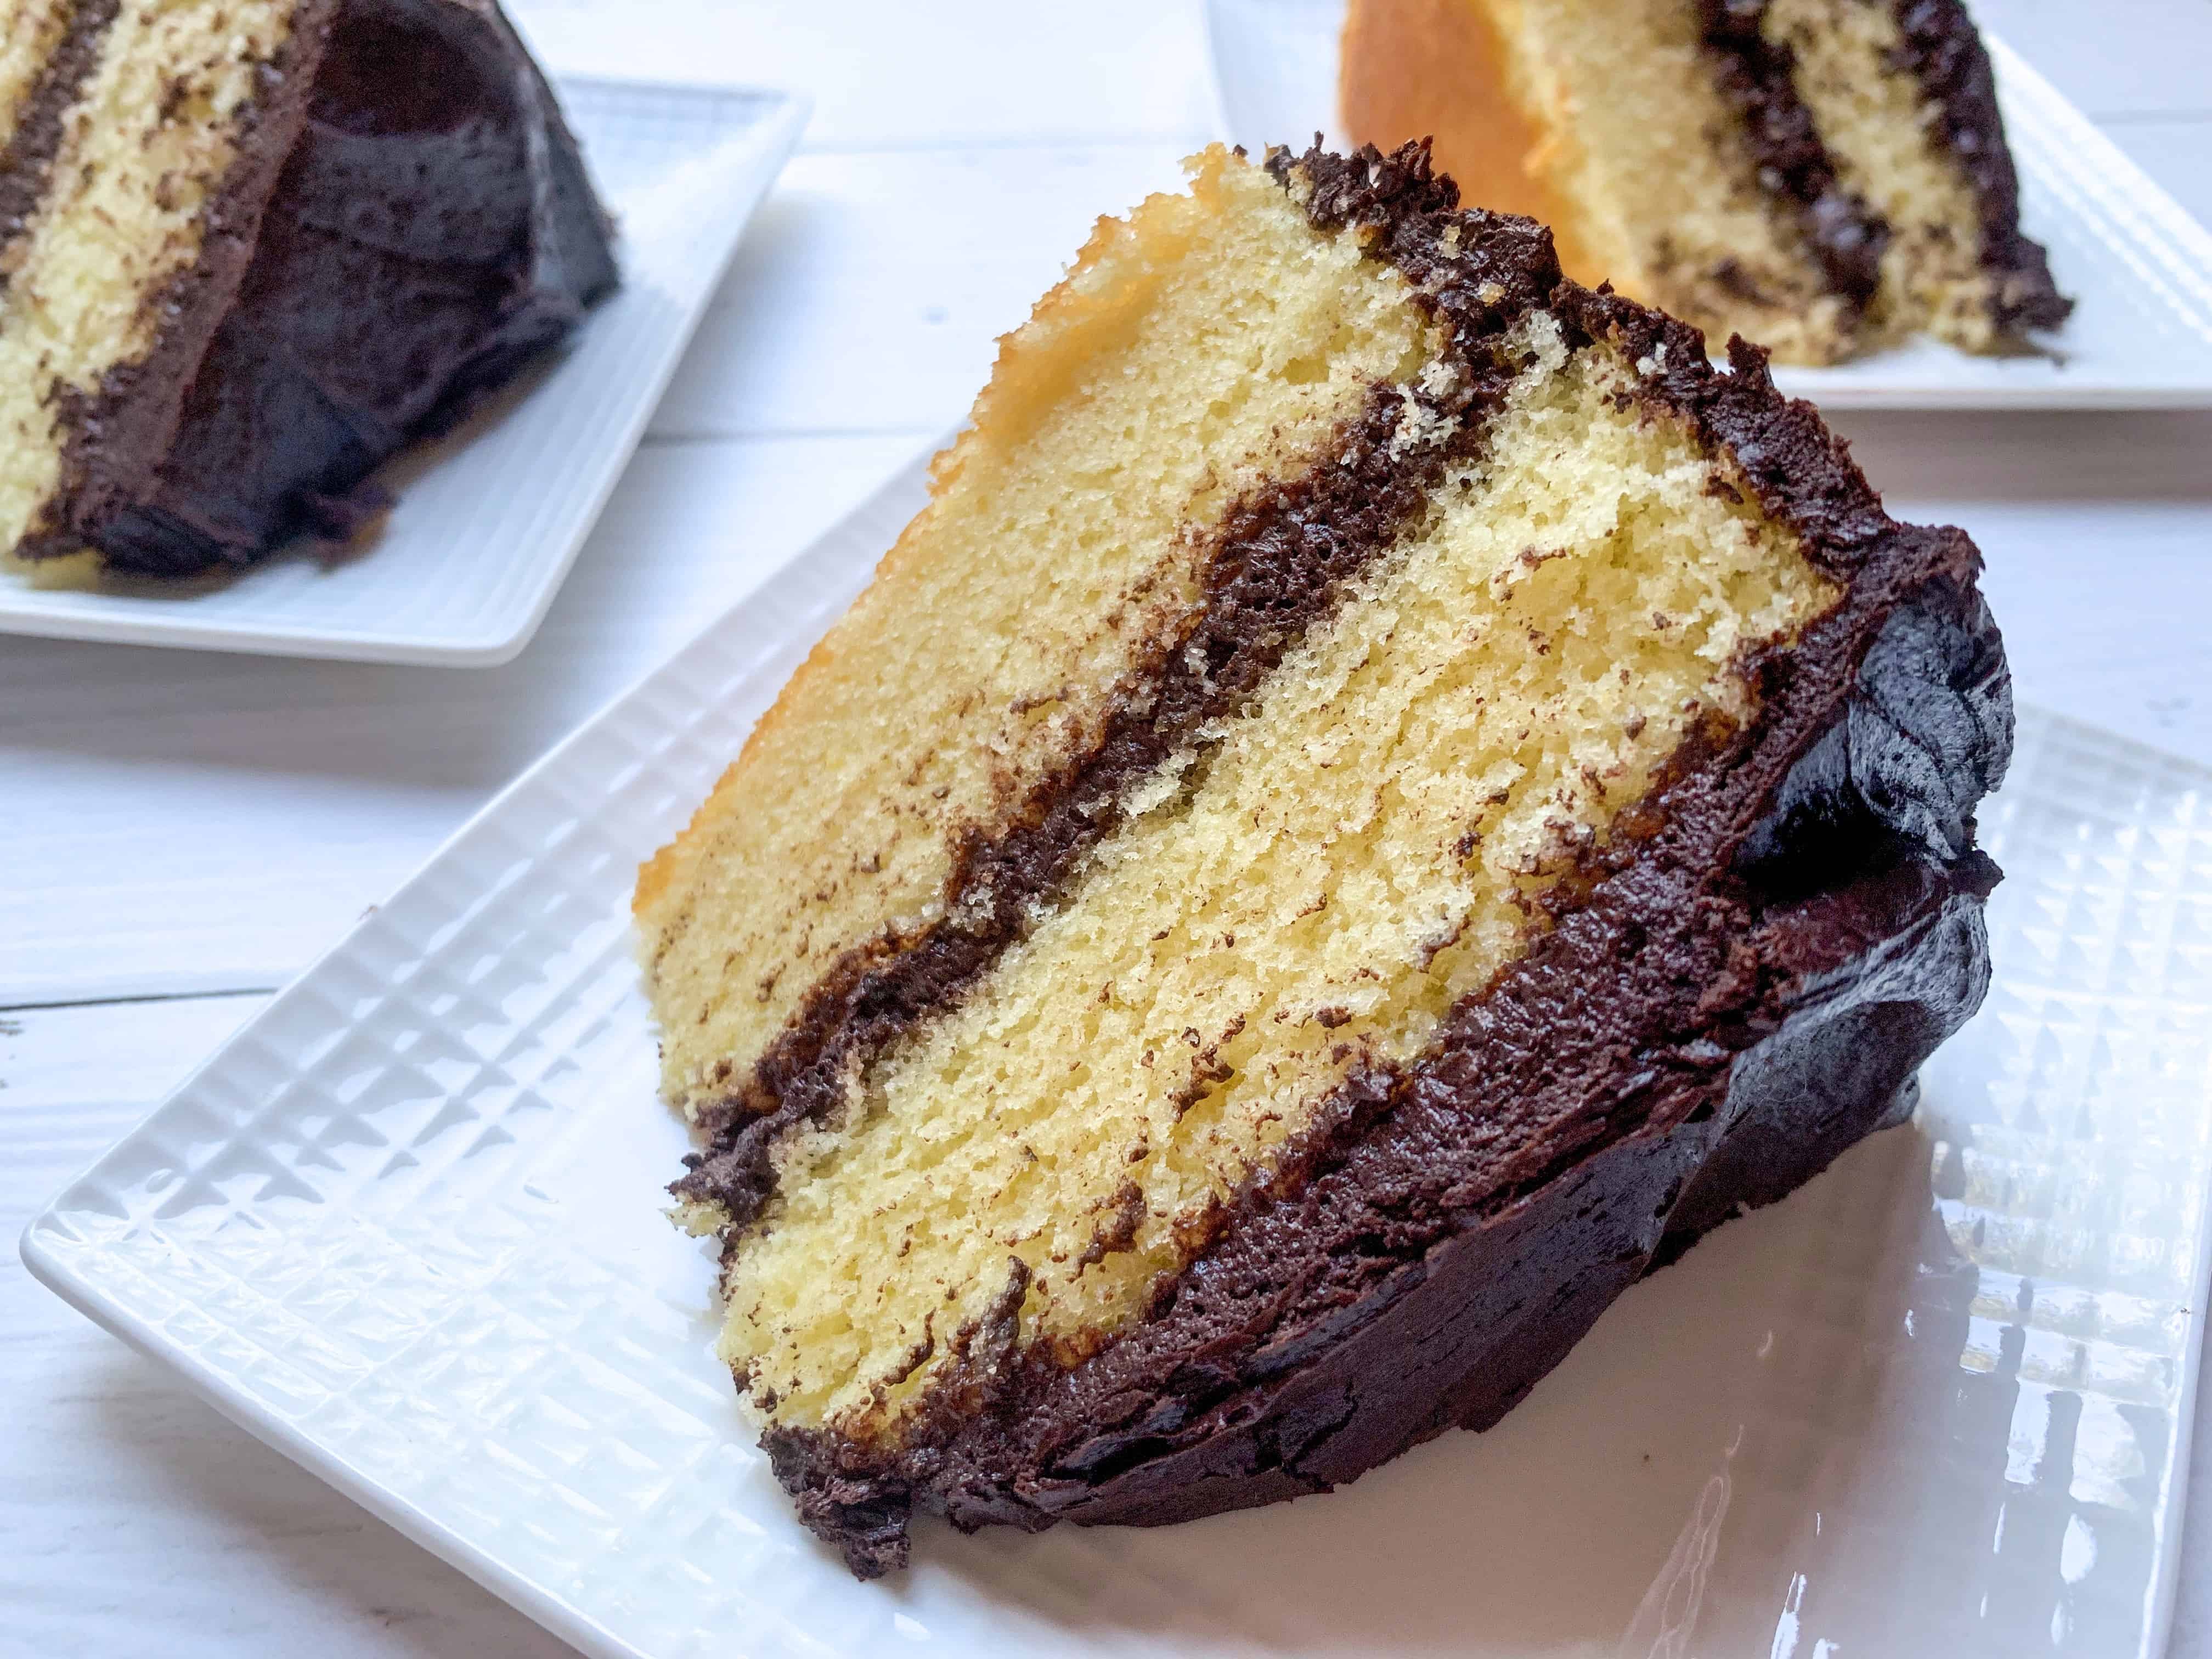
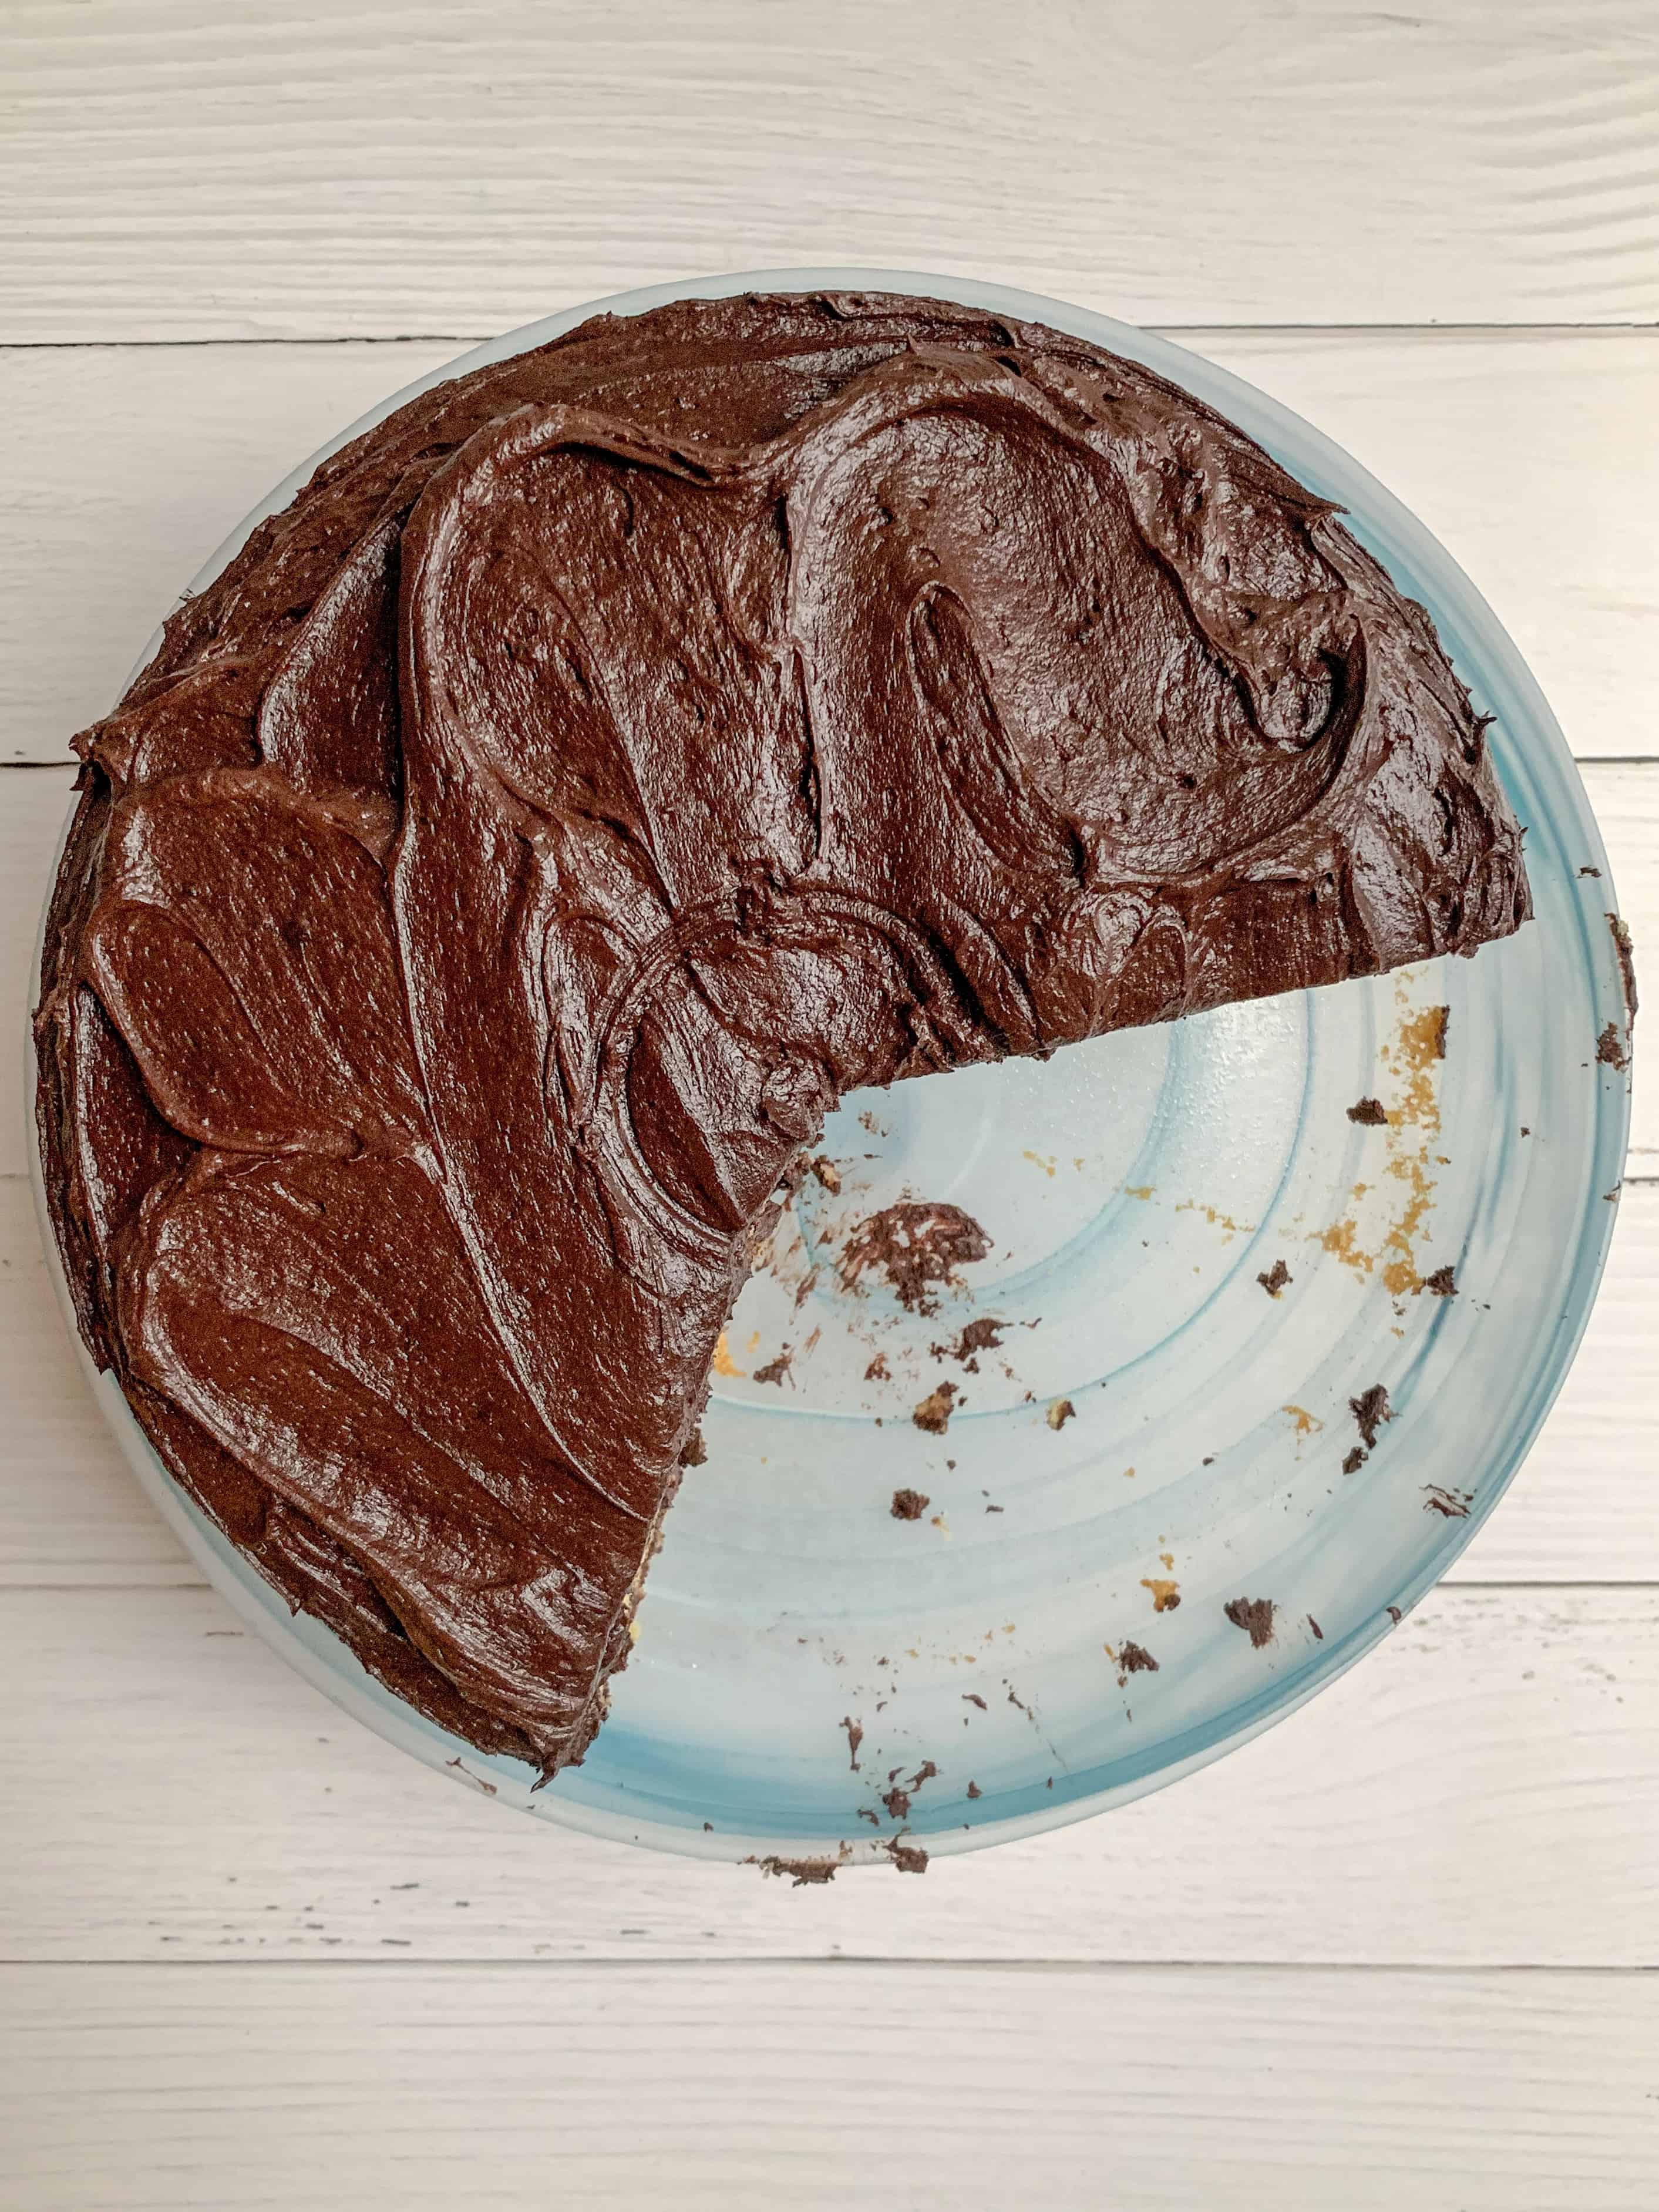
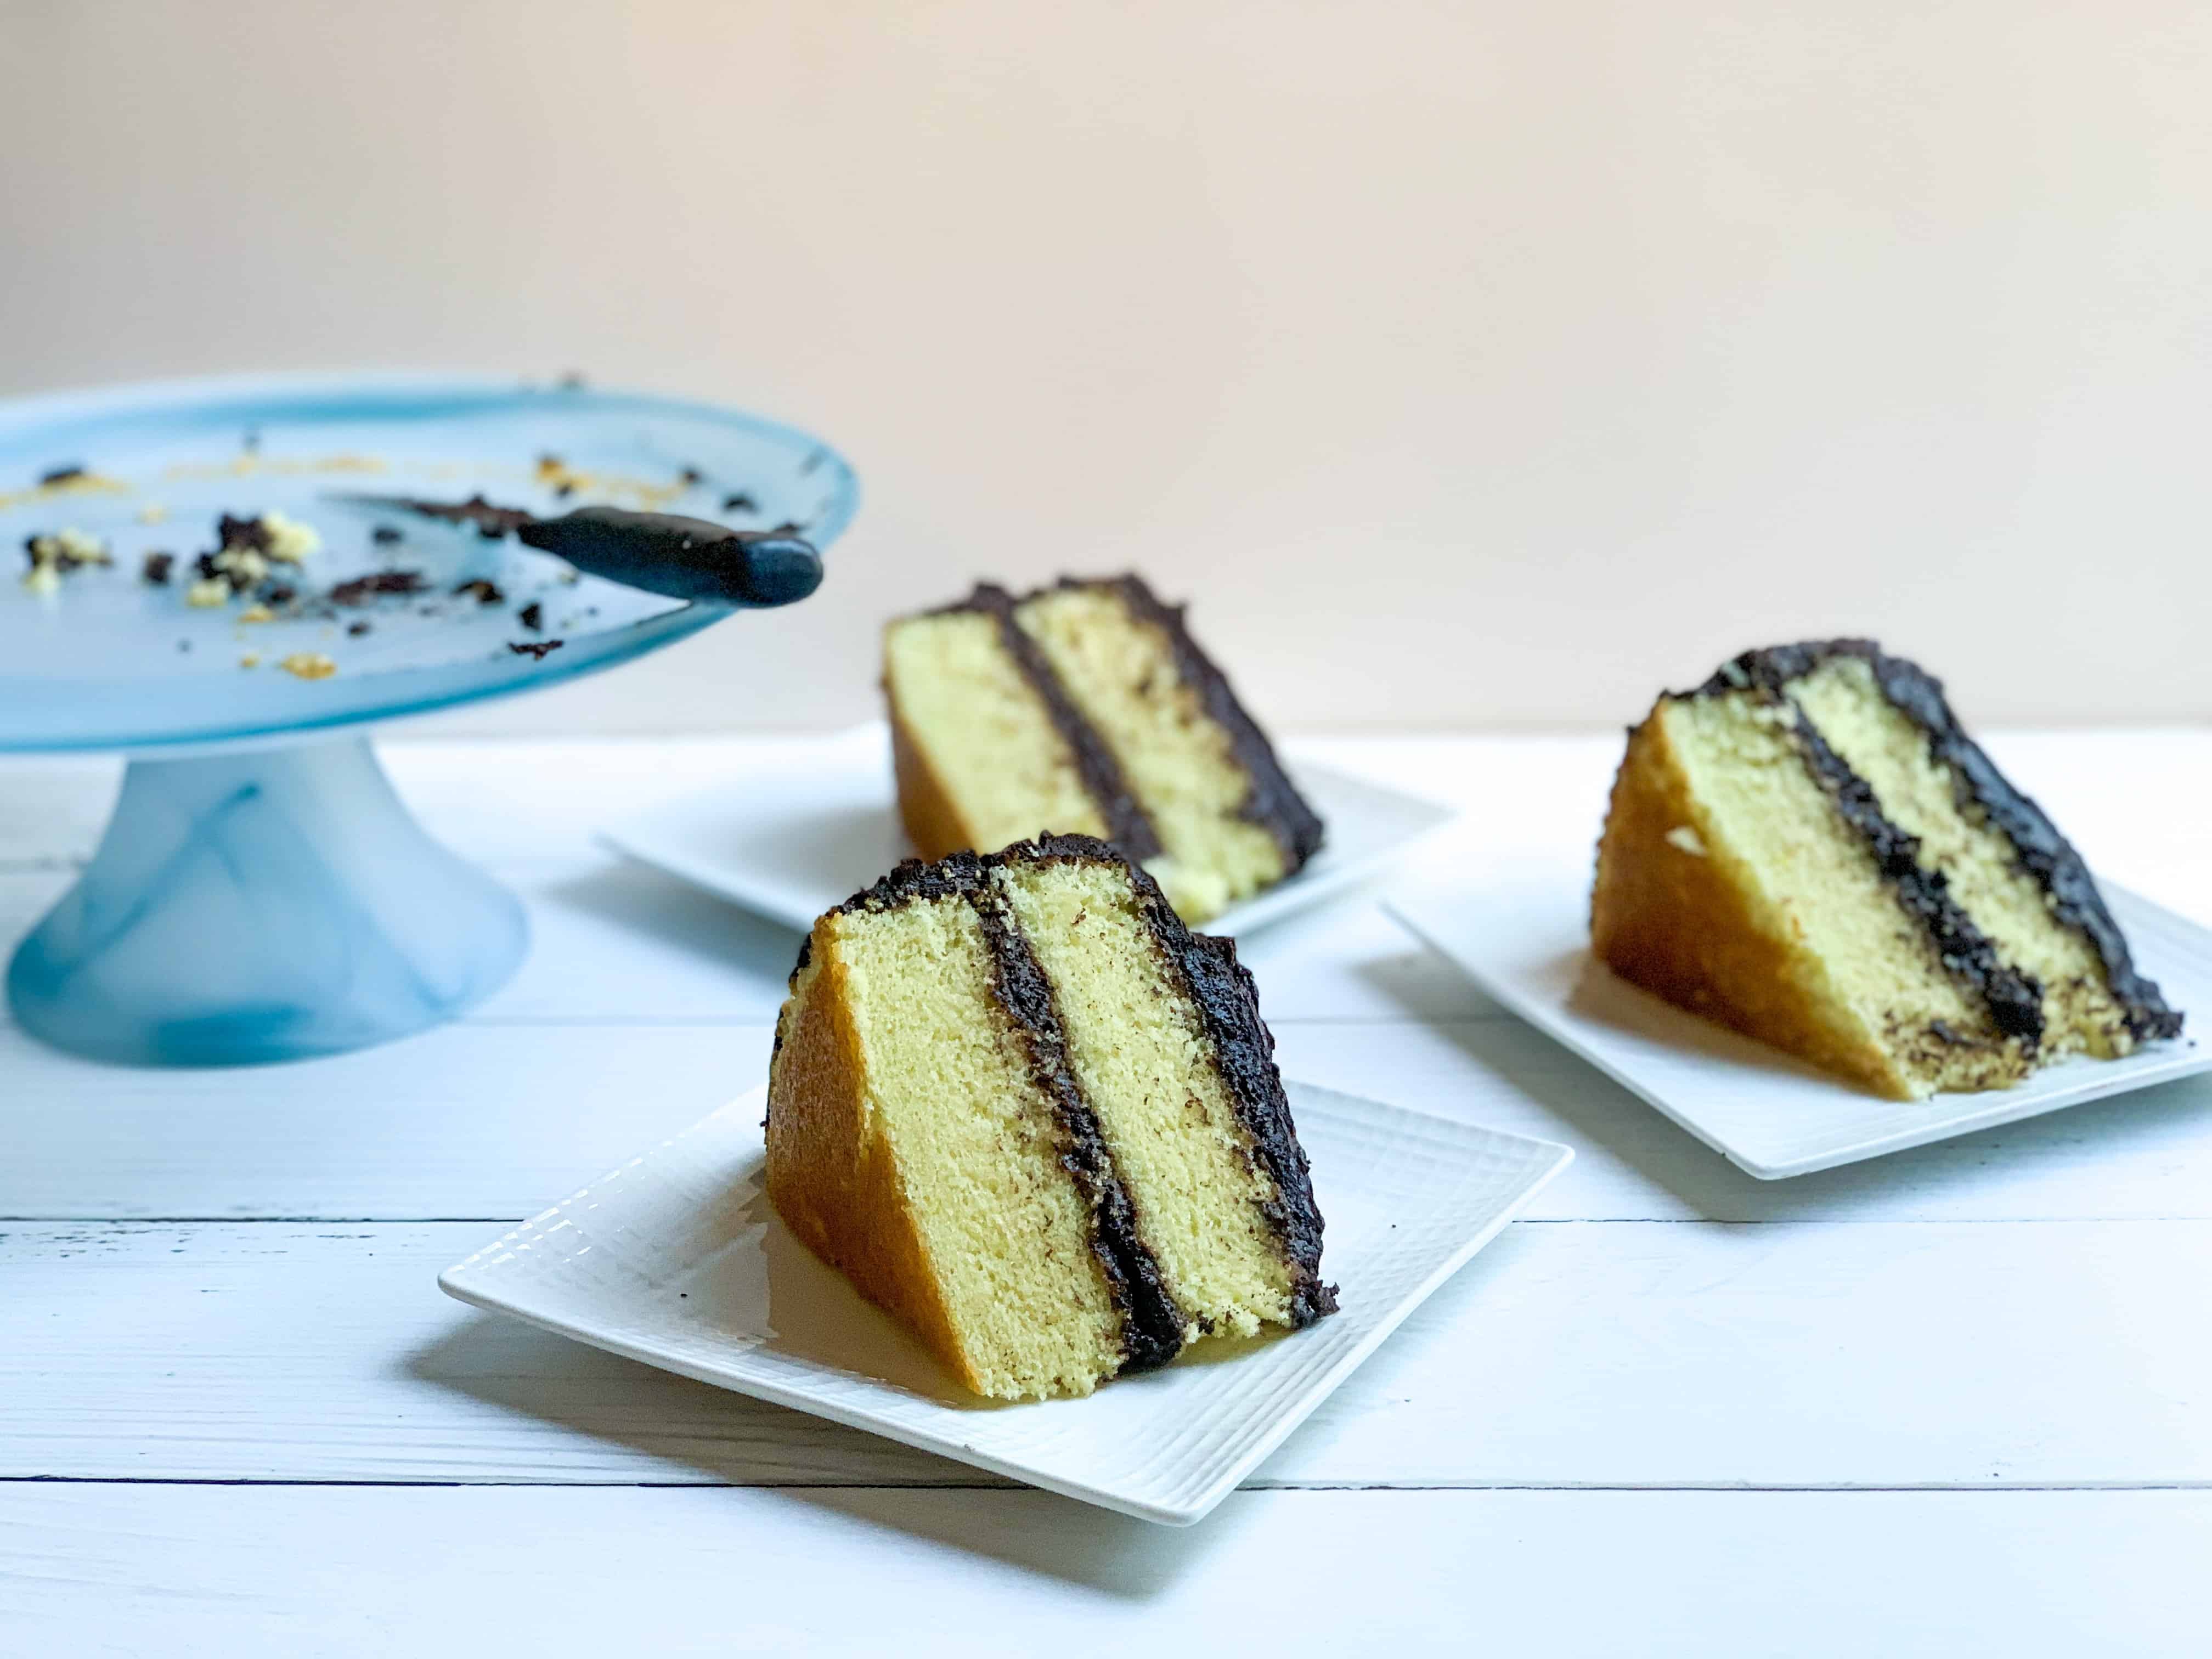
This classic yellow birthday cake is sure to be a crowd pleaser for the next celebration in your life. This cake is a beloved classic for celebrations for a reason -- it's got a fluffy texture, a moist-but-not-too-moist interior, a decadent chocolate frosting on the exterior...what's not to love?!
As we approach the warmer months (thank God!), I'm most excited for the kids to be outdoors more often, riding their bikes, playing with the other children in the neighborhood, and just being a kid. And with all that will hopefully come less illnesses. Flu season? Cold season? You suck, and I'm done with you.
Want to Save This Recipe?
Enter your email below, and I'll send it to you. Plus, you'll get delicious new recipes from me!
By submitting this form, you consent to receive emails from Worn Slap Out
Speaking of illnesses, does your child's school have a health anxiety board where all the sicknesses from the school are posted by room so you can see all of the awful diseases that are spreading on a daily basis? Like this? This is the first thing you see when you walk in the doors at ours.
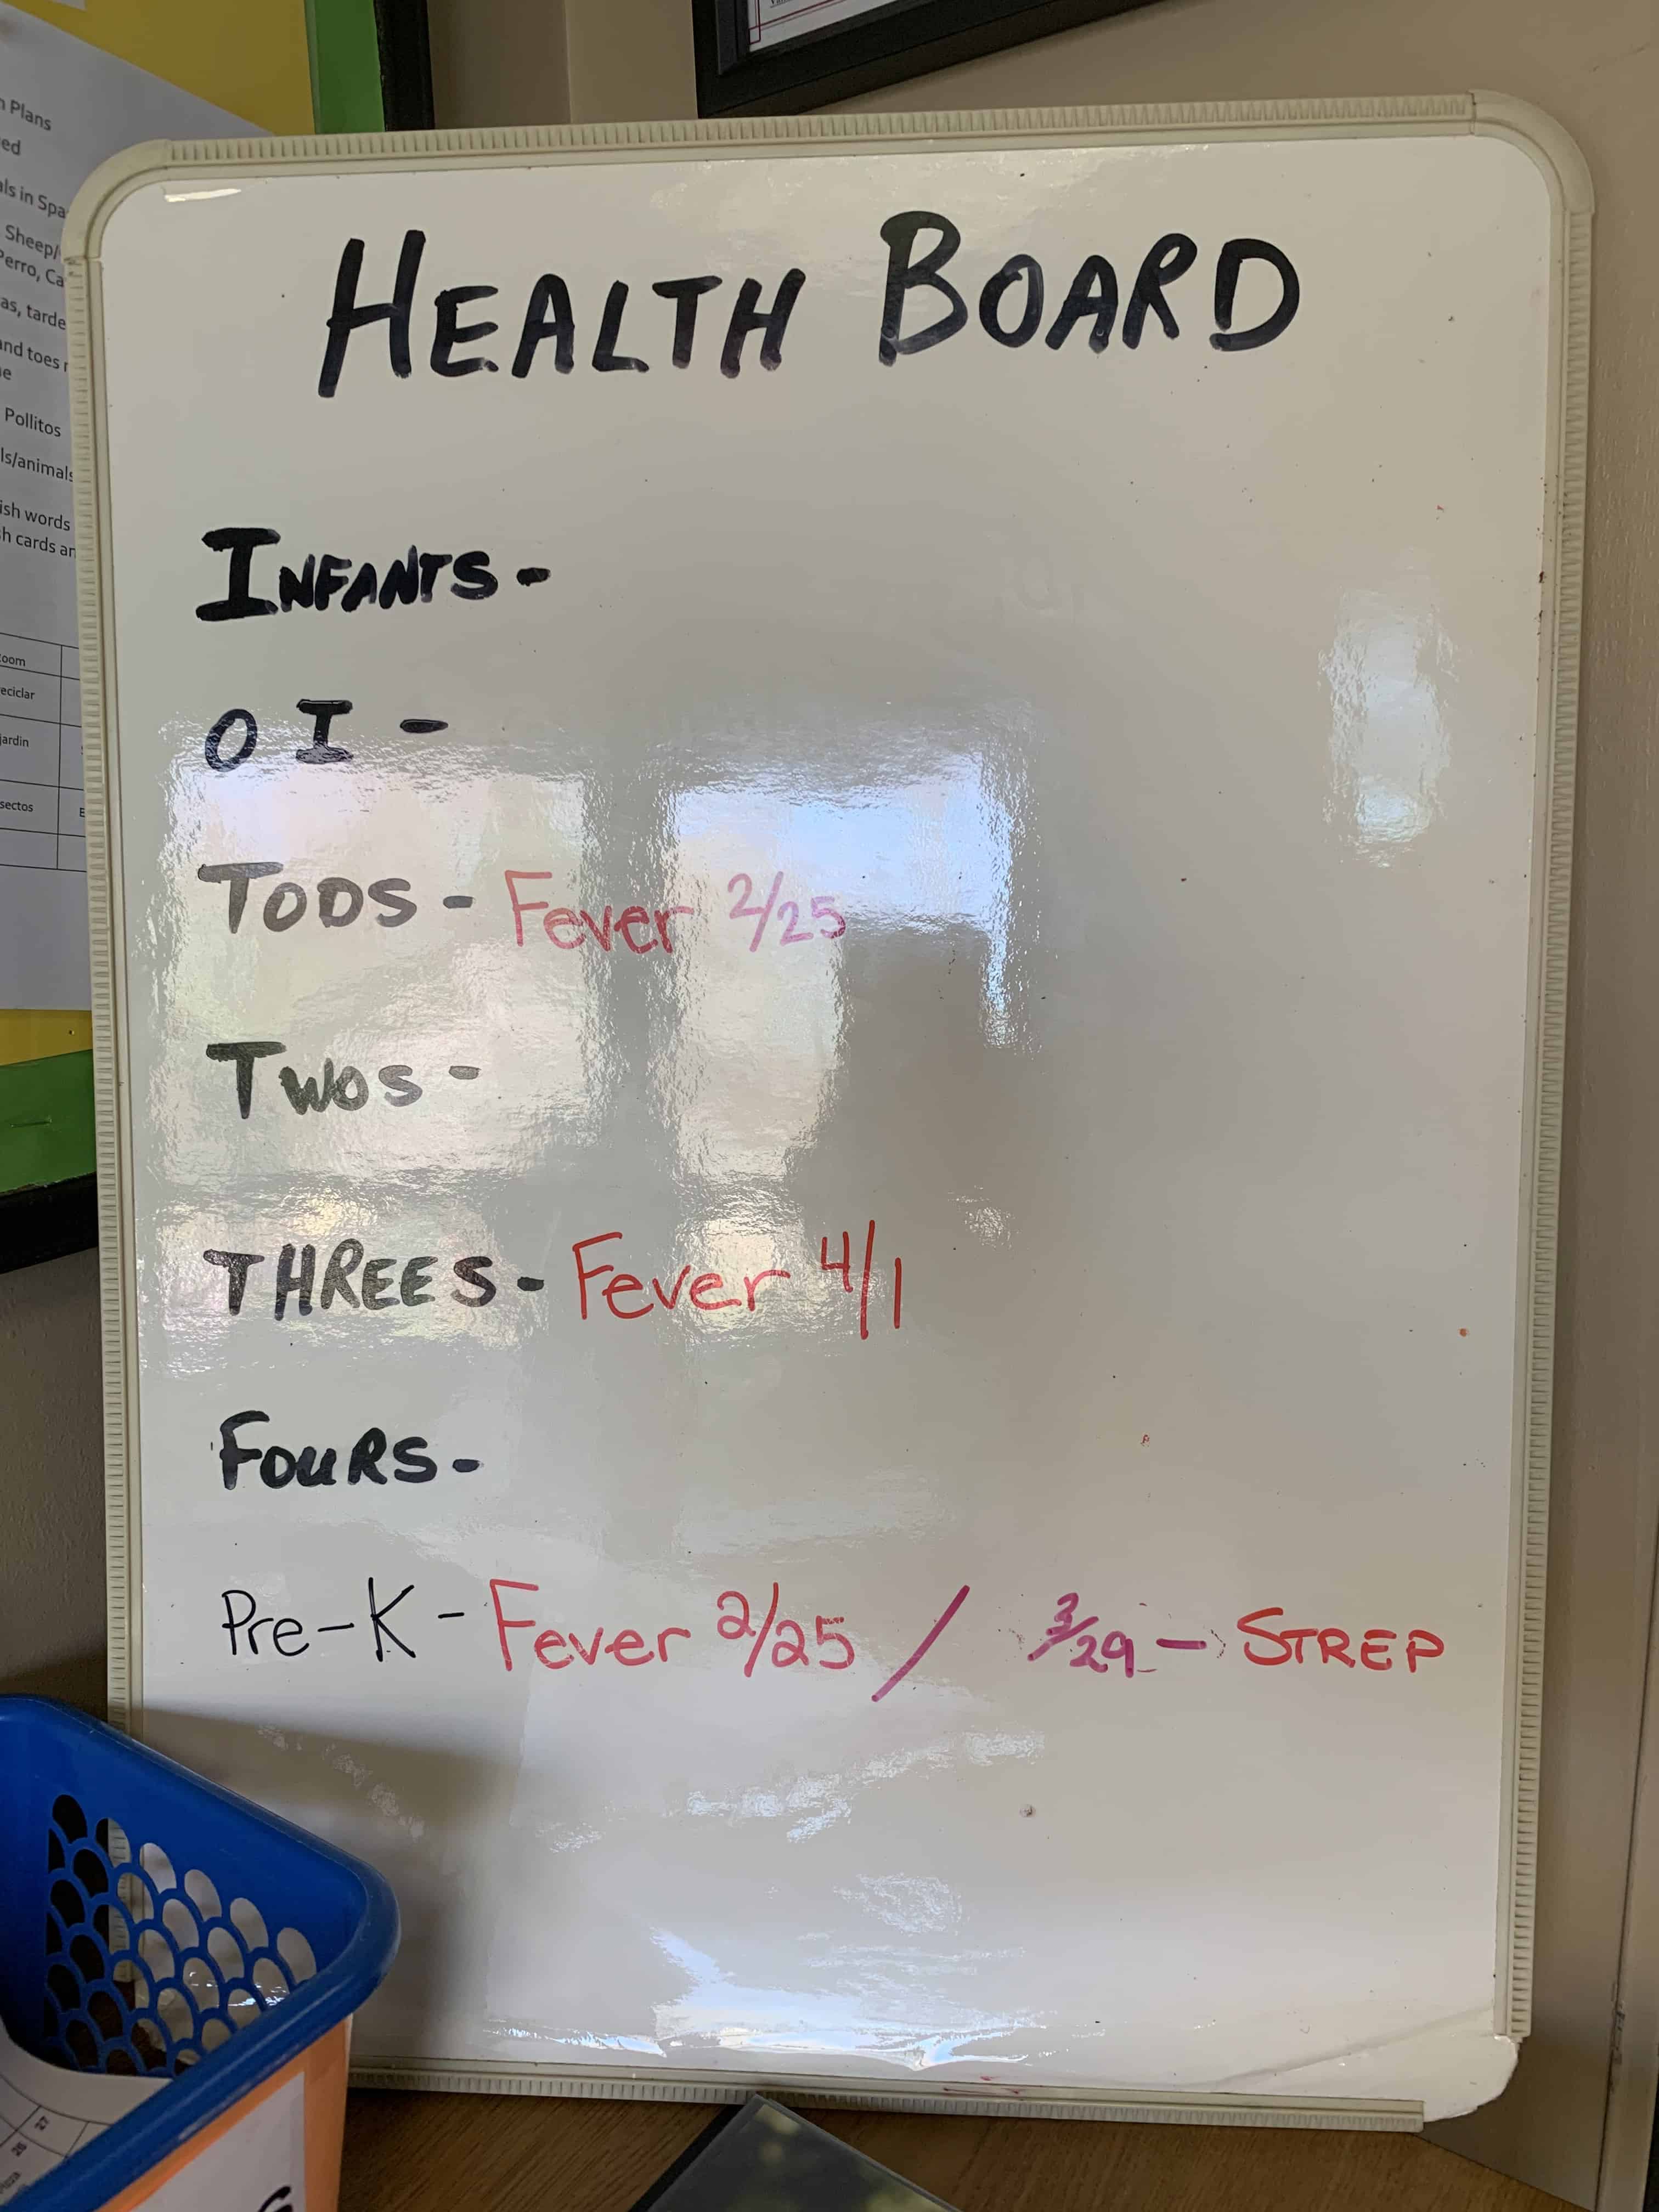
Anytime I get a call from a mysterious 301 number my heart immediately sinks. Shit. Someone is running a 119 degree fever, vomiting profusely, acting like a maniac to the point where teachers don't want to deal with them, or has broken a limb. (All of those scenarios have actually happened, by the way). Last week I got this type of call when I was just about to leave work for the day. I knew. I just knew.
"Hi, this is Cindy from ___ School. This is not an emergency."
Phew. Okay, I'd almost wish they'd just reverse the order of that introduction. I don't even care who you are...JUST TELL ME MY CHILDREN ARE OKAY!
"We noticed Bri has a rash on her arms. It's red and looks a little raised. The teachers didn't notice it until this afternoon but it seems to be getting a little worse, and she seems to be itching it.
Eh, she's fine, I thought. "Thanks for letting me know. I'll be there in 10 minutes anyway."
Then it suddenly hit me. Bri was playing with a red stamp she had gotten from a little friend's birthday party the day before. She had stamps going up and down her whole arm. Unknowingly, the front office had called to let me know I need to give my child more regular baths essentially. (I did try to wash off some of the reside but did a half ass job clearly)
How should they capture this on the anxiety board? Maybe "Twos room: filthy girl"?
Let's celebrate the beginning of warmer weather and (hopefully) no more calls from school about illnesses...or your child needing a bath.
Enough about kids. Let's talk about cake.
This classic yellow birthday cake is truly the best yellow cake recipe I've seen and would be great for any celebration - made up or not. I made it for John's birthday recently. It's one of those things that if you have the time and the bandwidth...you just can't beat a homemade cake like this compared to the boxed variety. It was named King Arthur's recipe of the year for a reason!
Full disclosure: I have absolutely nothing against shortcuts and using boxed cake mixes and brownie mixes when you need them. I'm pretty smart about when I use and when. If it's for a school function and for kids, I go with the boxed cake mix (because frankly, they don't care). If it's for teachers or other adults, I try to go with homemade (because #refinedpalate). If I'm in a hurry and need something in a pinch or just have a serious craving, boxed mixes win. If I'm baking on a weekend, I usually go the homemade route. My motto: use shortcuts when you need them. This shortcut cookies and cream ice cream cake is a great example!
It has a moist, classic yellow cake flavor (AND the color is spot on without adding any artificial dyes) and it's topped with the most decadent fudge frosting. Pro tip: I highly recommend using Valhrona cocoa for the frosting to make it that much better.

Ingredients
For the cake
- 2 cups King Arthur Unbleached All-Purpose flour OR Gluten Free Measure for Measure Flour
- 1 ¼ teaspoons salt
- 2 teaspoons baking powder
- 4 large eggs at room temperature
- 2 cups granulated sugar
- 1 tablespoon vanilla extract
- ⅛ teaspoon almond extract; optional for enhanced flavor
- 1 cup milk whole milk preferred
- 4 tablespoons (¼ cup) butter cut into pats
- ⅓ cup vegetable oil
For the frosting:
- 1 ¼ cups natural cocoa powder sifted if lumpy
- 1 cup + 3 cups confectioners' sugar sifted if lumpy
- ¼ teaspoon salt
- ⅓ cup hot water
- 1 tablespoon vanilla extract
- 16 tablespoons (1 cup) butter softened
Instructions
- To make the cake: Preheat the oven to 325°F with a rack in the center. Lightly grease two 8†x 2†or 9†x 2†round cake pans; for extra protection against sticking, line the bottom of the pans with parchment rounds (you can cut these yourself or use precut 8†or 9†rounds), and grease the parchment. If your 8†pans aren’t at least 2†deep, use 9†pans.
- Weigh your flour; you’ll find its weight by toggling to “grams†at the top of the ingredient section above. Or measure it by gently spooning it into a cup, then sweeping off any excess.
- In a small bowl, combine the flour, salt, and baking powder. Set aside.
- In a large mixing bowl, either using an electric hand mixer or a stand mixer with whisk attachment, beat the eggs, sugar, vanilla, and almond extract, if using, until thickened and light gold in color, about 2 minutes at medium-high speed. If your stand mixer doesn’t have a whisk attachment, beat for 5 minutes using the paddle attachment. The batter should fall in thick ribbons from the beaters, whisk, or paddle.
- Add the dry ingredients to the mixture in the bowl and mix â€" by hand or on low speed of a mixer â€" just enough to combine. Scrape the bottom and sides of the bowl, then mix again briefly, to fully incorporate any residual flour or sticky bits.
- In a saucepan set over medium heat or in the microwave, bring the milk just to a simmer. Remove the pan from the heat and add the butter and oil, stirring by hand until the butter has melted.
- Slowly mix the hot milk-butter-oil mixture into the batter, stirring on low speed of a mixer until everything is well combined. Scrape the bowl and mix briefly, just until smooth.
- Divide the batter evenly between the two pans. You’ll use about 2 ¾ cups (about 580in each.
- Bake the cakes until a toothpick inserted into the center comes out clean and the top feels set, 26 to 30 minutes for two 9†pans, or 38 to 42 minutes for two 8†pans; a digital thermometer inserted into the center of the cakes should read 205°Remove the cakes from the oven, carefully loosen the edges, and allow them to cool for 15 minutes in the pans. Then turn them out of the pans and transfer them to a rack, right-side up, to cool to room temperature.
- To make the frosting: In a large mixing bowl or the bowl of your stand mixer, stir together - by hand or mixer - the cocoa powder, 1 cup (113of the confectioners’ sugar, and the salt. Stir in the water and vanilla, scraping the bowl if necessary.
- Add the butter and remaining confectioners’ sugar, stirring to combine. Using an electric hand mixer or a stand mixer with paddle attachment, beat the frosting at medium-high speed for 1 to 2 minutes, until lightened in color and fluffy, stopping halfway through to scrape the bottom and sides of the bowl. When the frosting is ready, scoop out a bit on your spatula; does it seem nicely spreadable? If it's too stiff, beat in water (1 teaspoon at a timuntil it's the consistency you want.
- To assemble the cake: Place one of the cake layers on a serving plate; tuck pieces of waxed or parchment paper underneath the edge of the cake to keep the plate clean. Spread the bottom layer with about 1 cup of frosting, enough to make a ¼â€ to ½â€-thick layer. Center the second layer bottom-side up (for a flat toover the frosted layer and press gently to set it in place.
- If your schedule permits, place the cake in the refrigerator or freezer, uncovered, for at least 30 minutes (or up to 2 hourto firm it up. This will make the layers less likely to slide around as you work, and the cake won’t shed crumbs as you frost. If you’re pressed for time, you can skip this step.
- To finish the cake: For the best-looking cake, do the frosting in two steps. First, spread a very thin layer of frosting around the sides and across the top; this is called a crumb coat. You should be able to see the cake through the frosting in spots, it’s that thin. Refrigerate the cake for 20 minutes to let this layer set. Again, skip this step if time is a factor.
- Once the cake is chilled, use the remaining frosting to coat it thoroughly and evenly.
- Store the cake, covered, at room temperature, or in the refrigerator if your kitchen is hot. Let it come to room temperature before serving.
Notes
Amy says
I've been looking for a new cake recipe, yum!