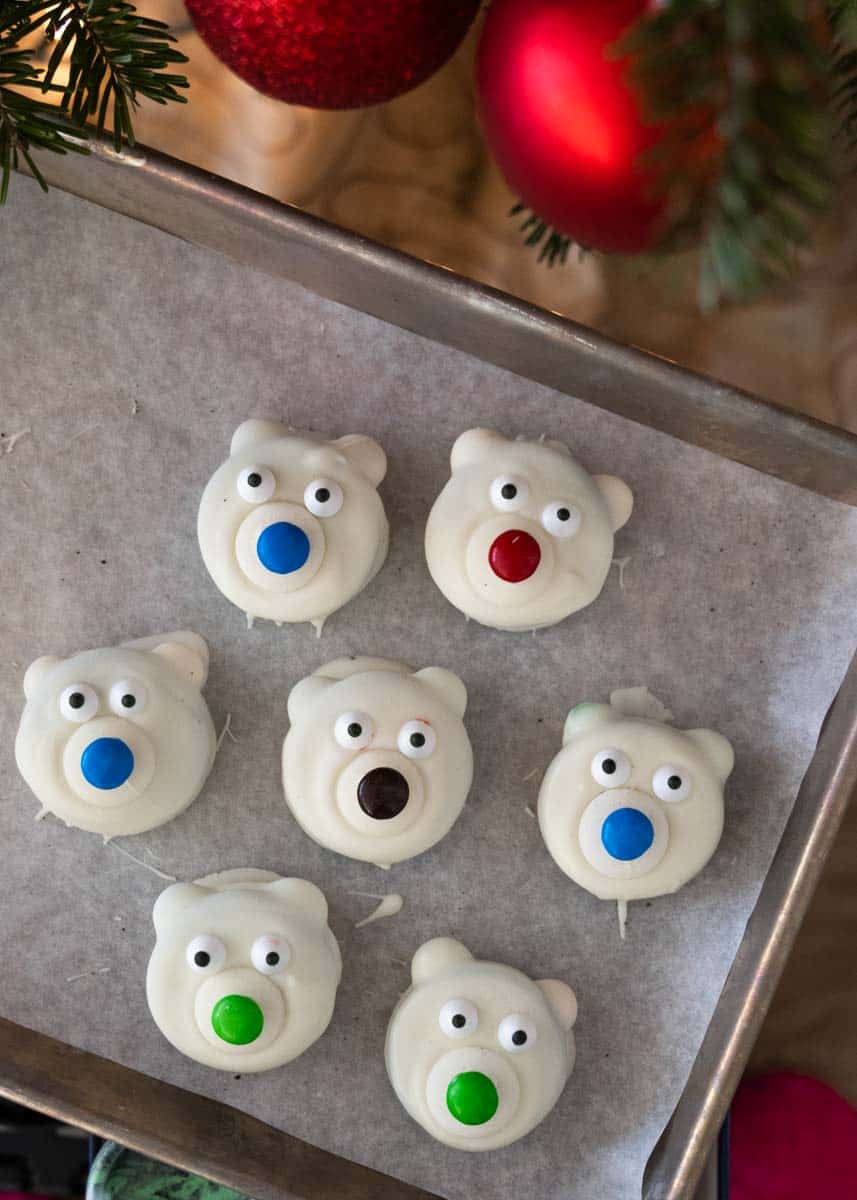
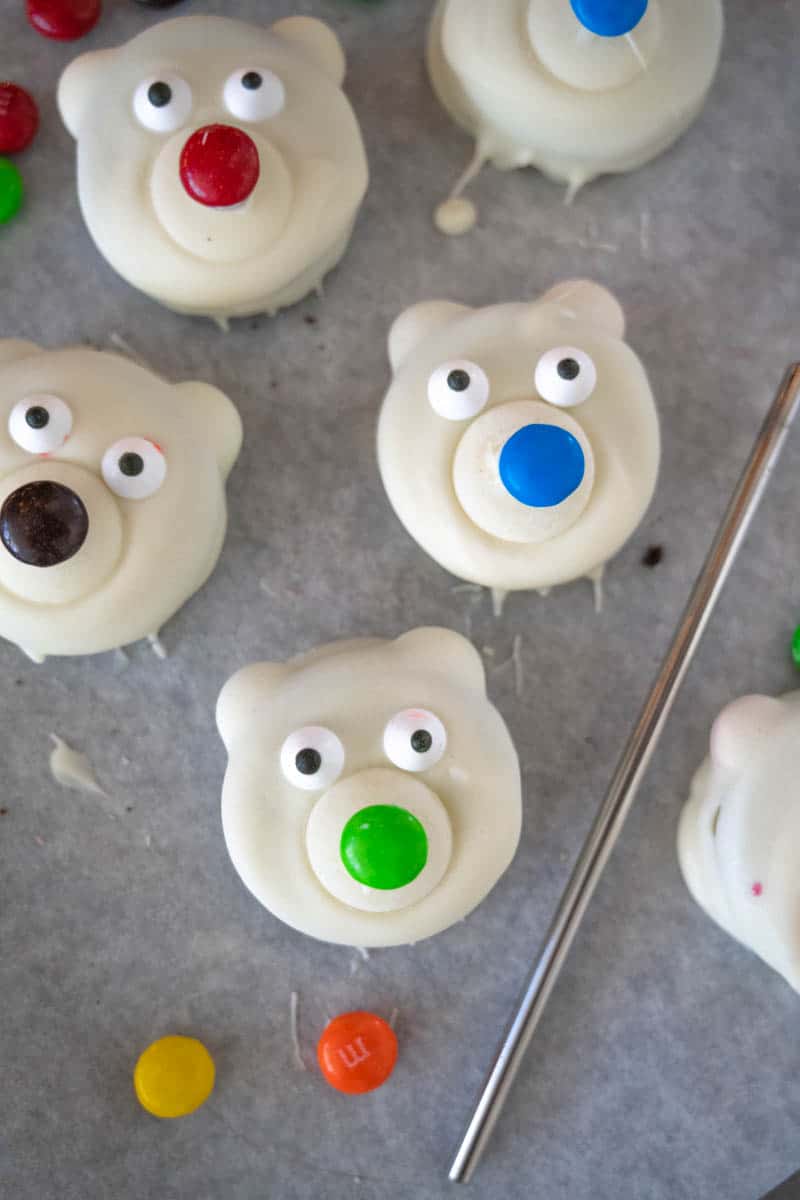
These kid-friendly, no bake Polar Bear Oreos make the most adorable winter treat. The best part is that they're made in just a few minutes!
Worn Slap Out, LLC is a participant in the Amazon Services LLC Associates Program, an affiliate advertising program. As an Amazon Associate, I earn from qualifying purchases. Each of your purchases via Amazon links supports Worn Slap Out at no additional cost to you.
Want to Save This Recipe?
Enter your email below, and I'll send it to you. Plus, you'll get delicious new recipes from me!
By submitting this form, you consent to receive emails from Worn Slap Out
'Tis the season for winter time shenanigans...and the Scholastic Book Fair. The books were the last thing I cared about as a child. There were so many erasers, journals, and pens to spend the $10 my parents would give me. The Scholastic Book Fair must've been the first (and only) time ever being handed money. Now if we could all continue to channel the joy of a 7 year old at the Scholastic Book Fair, the world would be in a better place.
I promise this is going somewhere and somehow connected to these Polar Bear Oreos. When the Scholastic Book Fair rolled around this year, my older child got ME a book with MY money. It was a cookie cookbook, and the gesture was awfully sweet. The cookbook has a ton of seasonal cookies you can make, and these adorable polar bears are one of them. My 8 year old insisted we make these together, and I wanted nothing more.
I'm sharing with y'all in hopes that you can make them with someone you love, too.
Why Make These Polar Bear Oreo Cookies
Here's the scoop on why you might want to make these polar bear cookies:
- The adorable factor. I mean, c'mon! Bring these to a party and you'll have everyone smiling.
- Kid friendly. My kids loved making these because they're not complicated. My 6 and 8 year olds easily can navigate all of the steps (and I didn't say they'd come out beautiful with a 6 year old but they are still adorable).
- Basic Ingredients. Nothing fancy needed to buy here. These polar bear Oreos just require a few basic things you probably already have.
Ingredients Needed
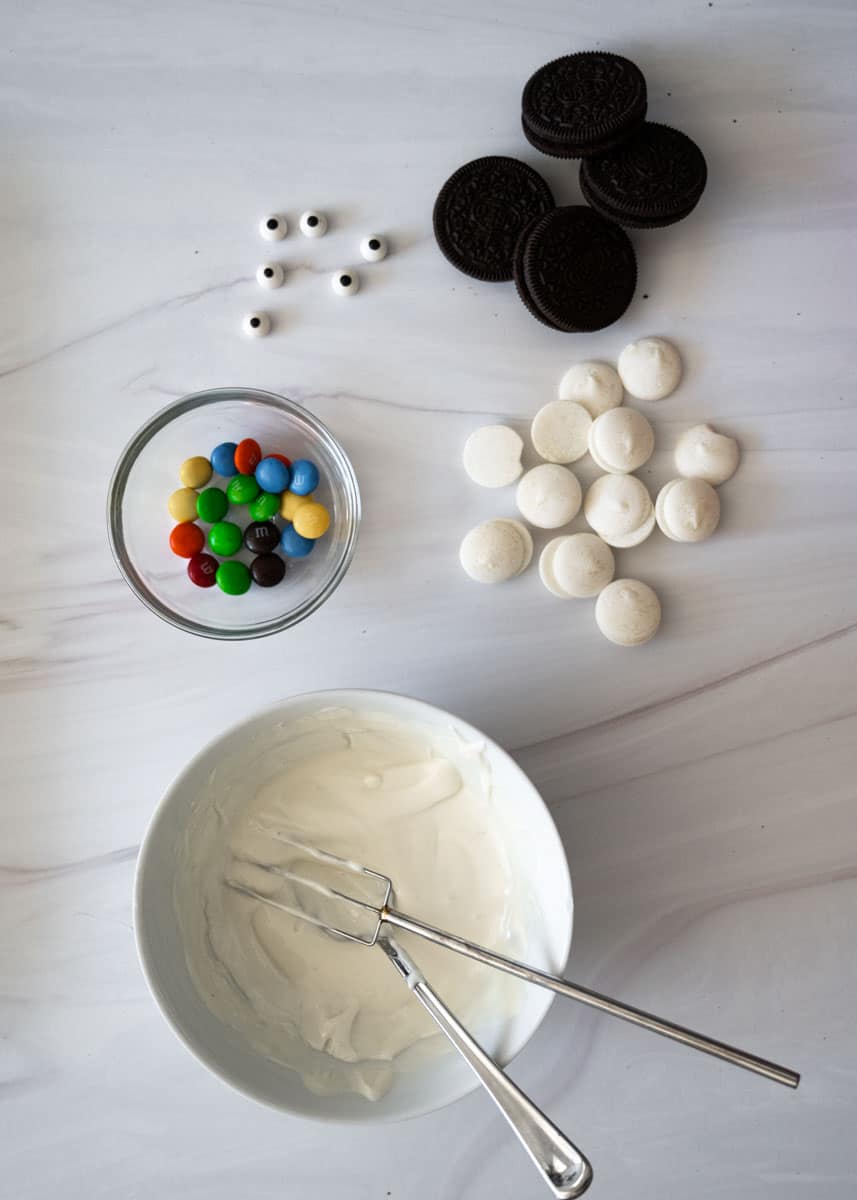
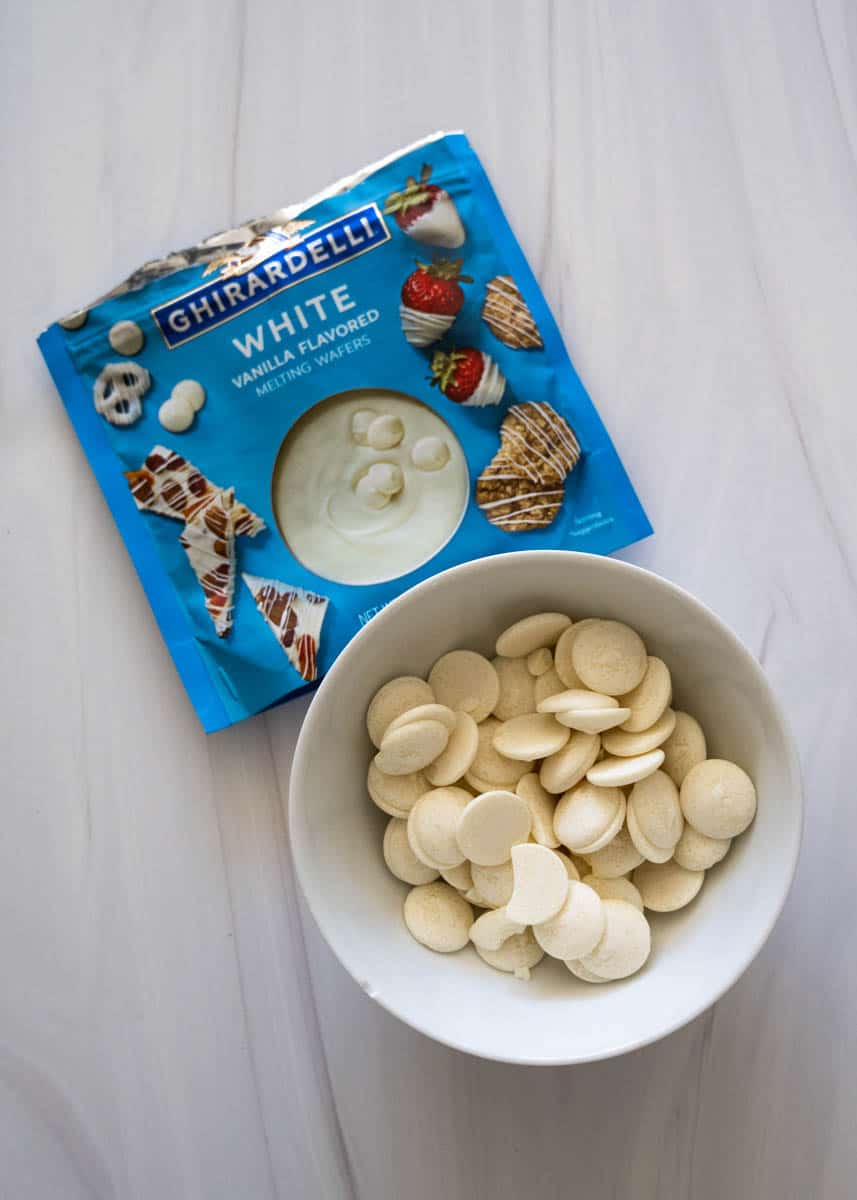
These polar bear Oreo cookies only require a few basic things, including Oreo cookies, regular sized M&Ms (not the minis), white chocolate melting wafers (I use Ghirardelli brand), and edible candy eyes.
Don't forget to set aside some white chocolate melting wafers before you start melting! Otherwise, you won't have any wafers to use as the polar bear muzzles!
Equipment That's Helpful
I'm a fan of using what you've got, and if you don't do a lot of chocolate dipping, then just use a fork to dip the Oreos in the white chocolate. If you plan on chocolate dipping a couple times a year, I STRONGLY encourage you to buy a dipping tool. I use the three-pronged pitchfork-looking one quite a bit, especially during the holidays. The tool is thin enough that it doesn't leave any marks on your chocolate.
Other than the dipping tool, grab yourself some parchment paper (love the pre-cut parchment paper) and a baking tray that will fit into your freezer.
How to Make Polar Bear Oreos in 5 Easy Steps
Here's how to make the Polar Bear Oreos in 5 very easy steps:
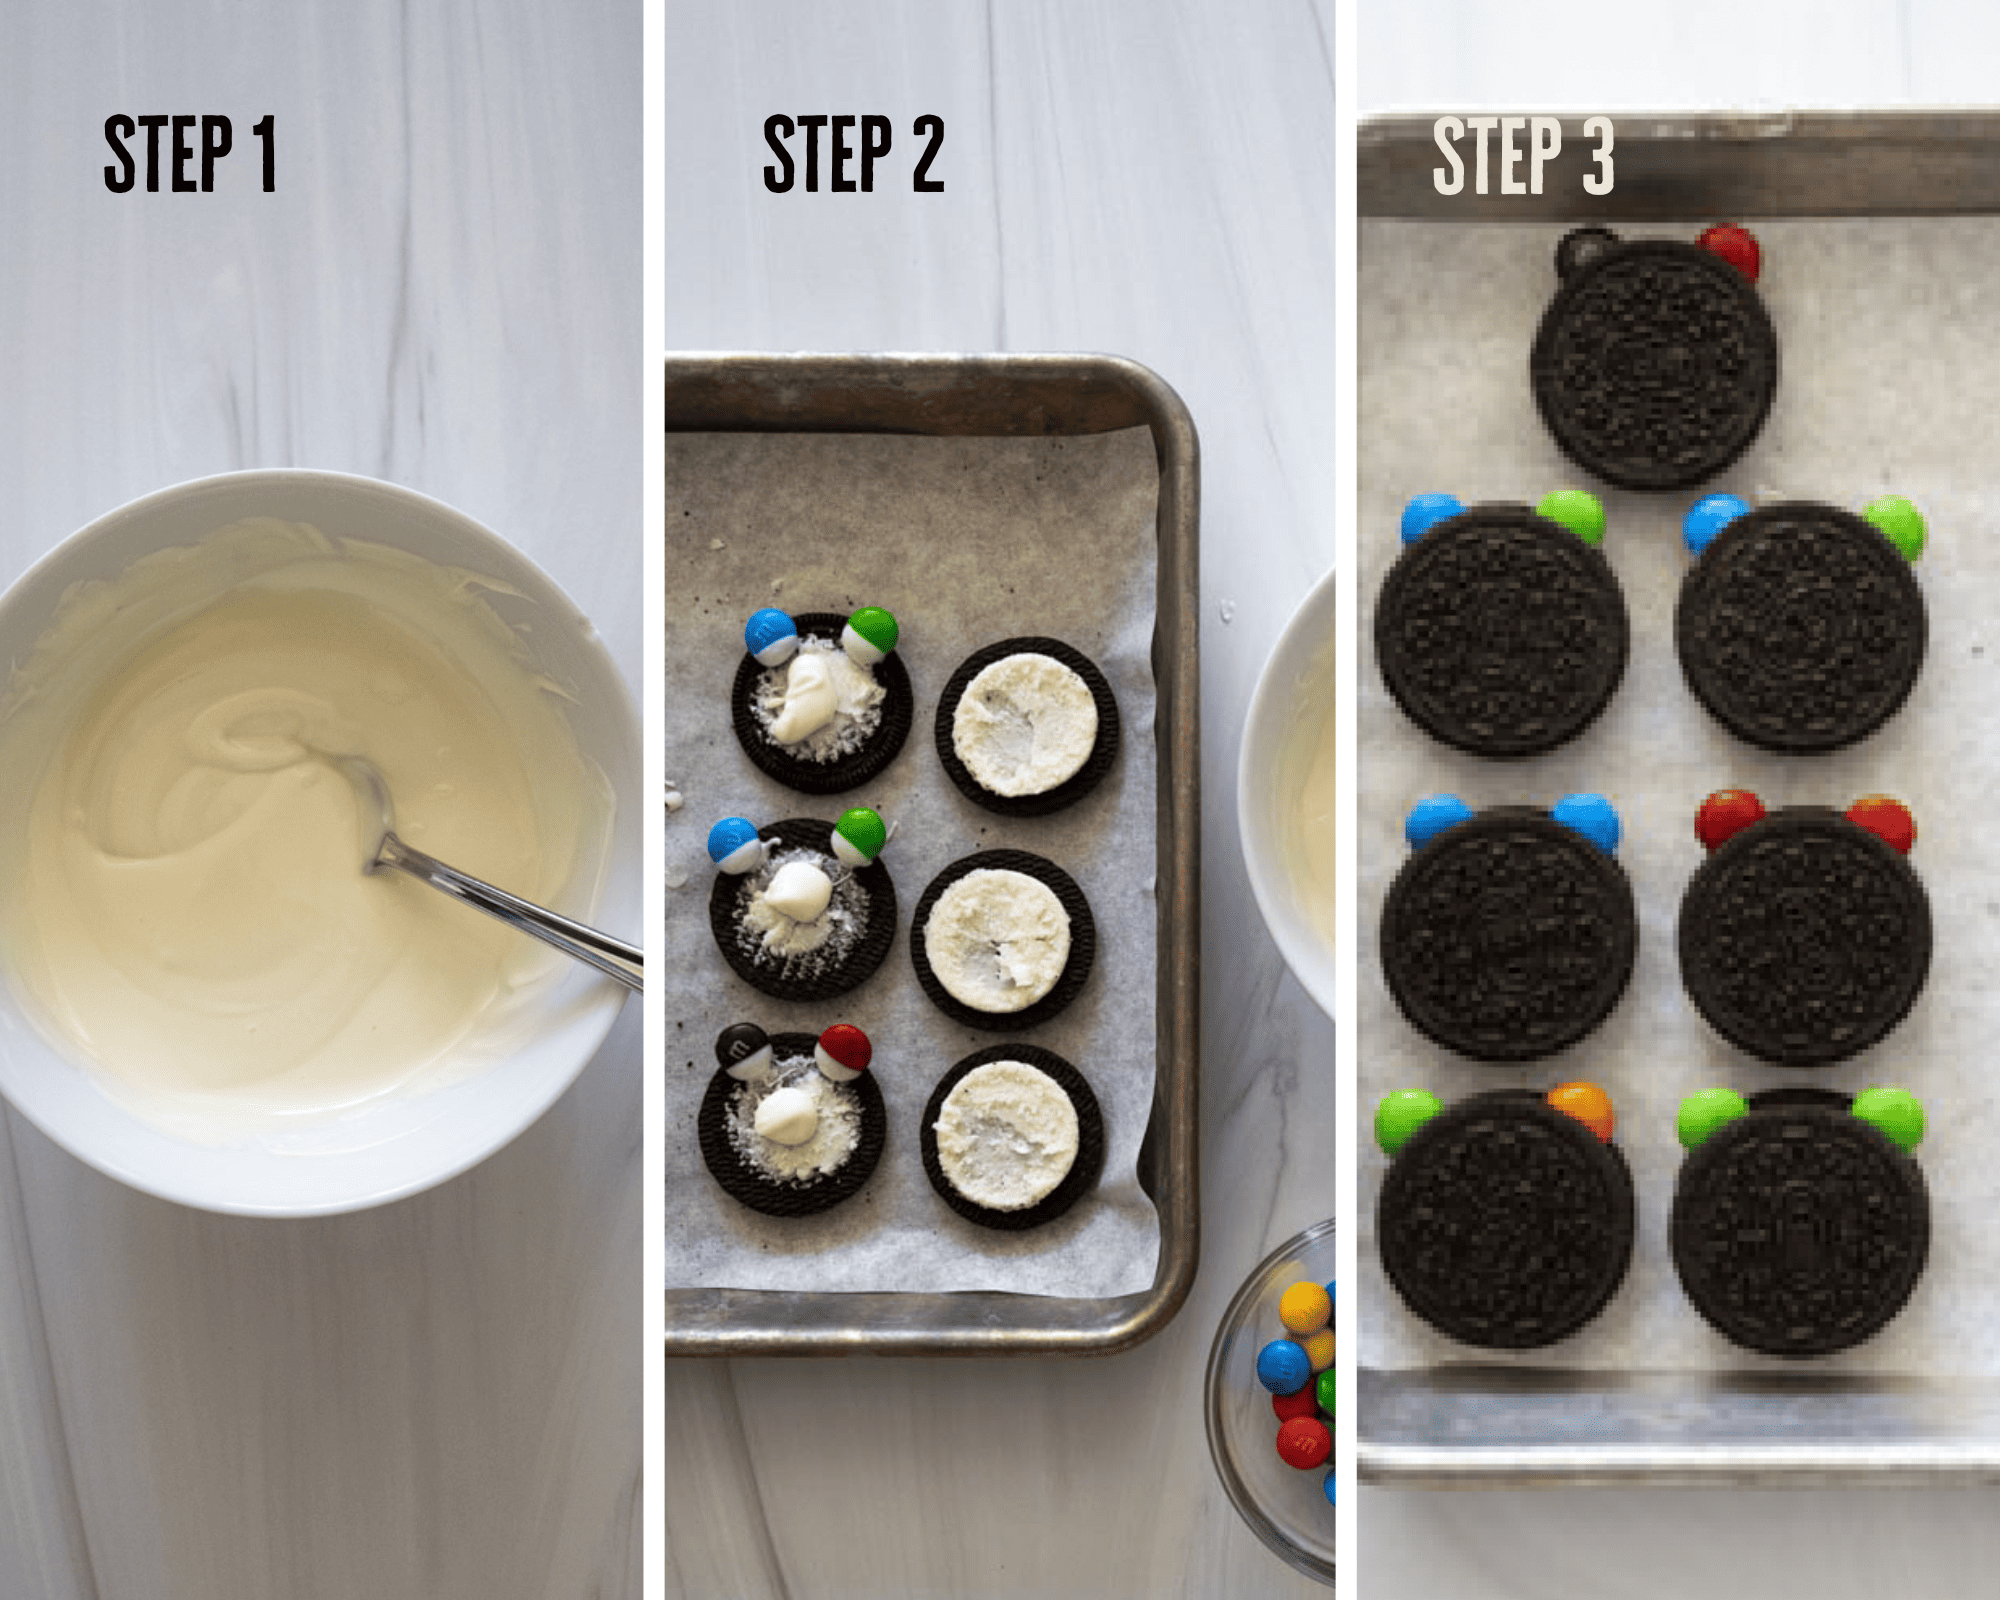
Step 1: Melt the chocolate.
In a small bowl, melt the white chocolate wafers in the microwave in 30 second increments, stirring each time. until completely smooth. The chocolate should be warm and silky smooth but not scalding.
Step 2: Prepare the Shape of the Polar
Open each Oreo cookie and dip the tip of two M&Ms into the white chocolate slightly. Place the M&Ms toward the top of one half of the Oreo for the polar bear's ears. Place a dollop of white chocolate in the middle of the Oreo cookie.
Step 3: Close the Cookie & Freeze
Place the other side of the Oreo cookie on top. It will stick nicely because you put the dollop of white chocolate in the middle. Once you've done a few of these, stick the whole baking tray in the freezer for about 10 minutes to firm up.
Step 4: Dip in the Chocolate
Dip the whole polar bear head into the chocolate. I use a spoon to make sure the white chocolate spread all around the cookie, then I take the polar bear out of the bowl of melted white chocolate using a candy dipping tool. Place back on the parchment paper.
Step 5: Add the Facial Features
When your chocolate is not quite set yet but also not still warm (about 2-3 minutes after dipping), add a whole piece of white chocolate melting wafer for the muzzle, an M&M (with the side that has the "M" dipped in the tiniest amount of chocolate), and two candy eyes.

Tips Before Your Start
- Set aside at least 20 whole white chocolate wafers. If you don't set them aside, you'll melt them all and then the polar bears won't have muzzles.
- Keep in mind that chocolate cools off fairly quickly, so you want to work fast and only do a few polar bears at one time. I typically do about 5-6 at the same time so I can work quickly enough to where the chocolate is still warm.
- Reheat the chocolate. As the chocolate gets cooler and becomes hard to work with, place in the microwave for another 30 seconds to get it back to being warm and smooth.
Kid Friendly Desserts
Love these and want some more inspiration for fun food projects to make with littles? Try some of these other favorites:
- Stick with the Oreo theme and make these adorable Chocolate Covered Oreo Reindeer
- Chocolate Covered Oreo Reindeer Cookies Rainbow Bundt Cake with Boxed Cake Mix
- Nutella Puppy Chow can be thrown into a bag and shaken!
- No Bake Chocolate Oatmeal Cookies
xox,
kathryn
Polar Bear Oreos
Ingredients
- 16 Oreo cookies
- 1 small bag M&M's
- 1 bag white chocolate melting wafers
- 1 package small edible eyes
Instructions
- Set aside about 16-20 white chocolate melting wafers. Melt the rest of the white chocolate melting wafers in a bowl in a microwave-safe bowl in 30 second increments, stirring each time.
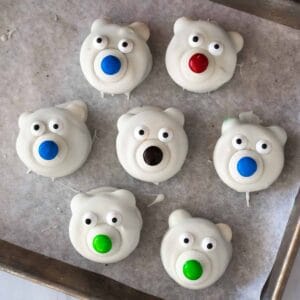
- Meanwhile, gently twist apart the Oreos and place both halves on parchment lined baking tray. Dip two M&Ms halfway in the chocolate so it's partially coated. Place the M&Ms toward the top of one half of the Oreo sandwich. See photos above for placement.
- Place a dollop (about a nickel size) of melted white chocolate in the middle of the Oreo and gently place the other half of the Oreo on top. Once you've done a few, place in the freezer while you do the rest.
- Take the Oreos out of the freezer. Using a fork or a candy dipper, dip the whole Oreo in the melted chocolate. If the chocolate firms up, place in the microwave for 20 seconds to melt again. Shake off excess chocolate and place back down on the parchment-lined baking tray. Repeat steps with the rest of the first batch of frozen cookies.
- Place a non-melted white chocolate wafer onto the Oreo for the muzzle, then a dab of melted white chocolate on the back of an M&M to make the nose. Add two candy eyes.
- Allow the cookies to set for about 20 minutes or place them in the freezer for about 10 minutes before enjoying.
Notes
- Set aside at least 20 whole white chocolate wafers. If you don't set them aside, you'll melt them all and then the polar bears won't have muzzles.
- Keep in mind that chocolate cools off fairly quickly, so you want to work fast and only do a few polar bears at one time. I typically do about 5-6 at the same time so I can work quickly enough to where the chocolate is still warm.
- Reheat the chocolate. As the chocolate gets cooler and becomes hard to work with, place in the microwave for another 30 seconds to get it back to being warm and smooth.
Lori says
I may change these bears to wearing sunglasses for the summer they're so darn cute!! And I bet they taste even better!
Kathryn says
I would love to see summertime polar bears! I like the way you think. Why wait until winter to enjoy these?! â¤ï¸â¤ï¸â¤ï¸