This pie crust from scratch uses both butter and shortening to create the most delicious flaky and buttery pie crust around -- and all with minimal effort. This pie crust is also great to freeze -- so make a couple batches and always have homemade pie crust on hand for when the mood strikes.
The time is NOW to start making pie crust from scratch. I mean, really. Trapped indoors...unable to socialize? That's me...and you...so let's socialize with some flour and a couple other ingredients and think about the possibilities! A fruit pie to welcome spring! A savory tomato tart! A quiche for a Zoom brunch date?
This pie crust makes two pie crusts (or one if you're doing a pie that requires a top and bottom) and is easily made in a food processor for a deliciously flaky and butter crust in under 10 minutes. Thanks to using both shortening and butter, this pie crust is the perfect base for either a sweet dessert or savory dish. While I'm putting forth the extra effort in the kitchen, I usually double this recipe and make 4 pie crusts and freeze 2-3 for a later date. It freezes really well.
Want to Save This Recipe?
Enter your email below, and I'll send it to you. Plus, you'll get delicious new recipes from me!
By submitting this form, you consent to receive emails from Worn Slap Out
Pie Crust from Scratch -- Are You Crazy?
Making pie crust definitely requires an extra step (which I have more than documented in this Perfect Peach Galette), but the rewards are great if you have the extra few minutes to spare (plus the chilling time). And this is coming from the girl who does both. Secret confession: I usually keep a pre-made pie crust in my freezer just in case the pie craving hits. When I have time (like now when I've been home a whole lot), it's a fun activity that makes me feel like a pioneer woman (just like this star bread).
Ingredients You'll Need
- all purpose flour
- salt
- unsalted butter
- vegetable shortening
- ice water
Not bad, right? You probably have most of these in your pantry right now -- except for maybe the shortening, but I'd highly encourage you to always have shortening on hand because you don't know when your chocolate chip cookie craving will strike or you'll want to keep making pie crust from scratch!
Directions for Making Pie Crust from Scratch
Step 1: Place ingredients into food processor.
Place all of the ingredients into a food processor (minus the ice water). Pulse the ingredients together until the dough gets gritty and the butter and shortening start to combine. Slowly add the ice water while you pulse 2-3 more times.
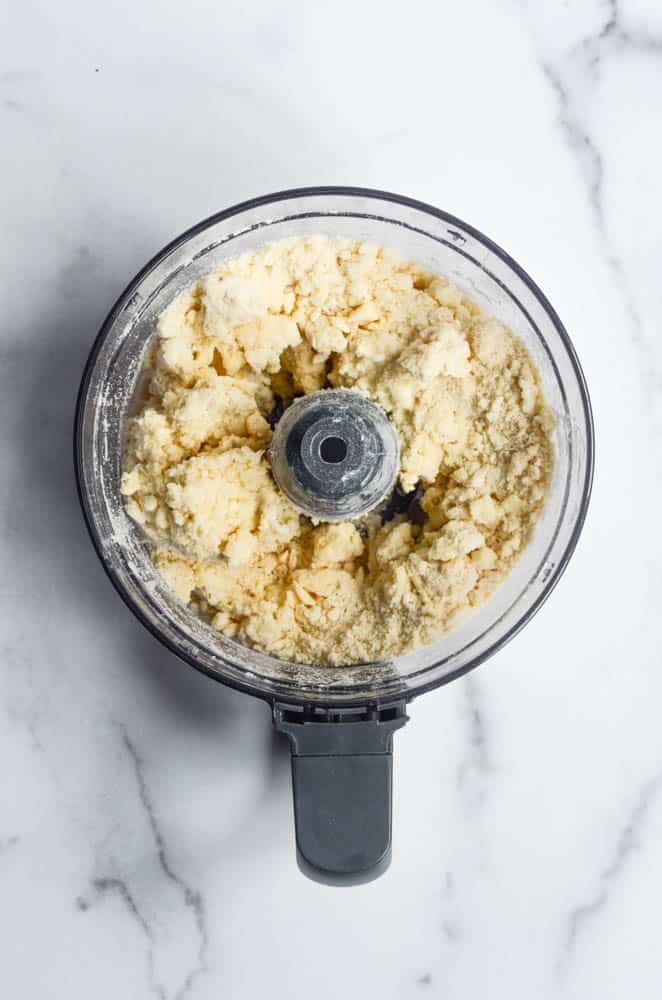
What if I don't have a food processor?
If you don't have a food processor, then use a pastry cutter or just a fork to combine all of the ingredients together. It'll just require some more elbow grease.
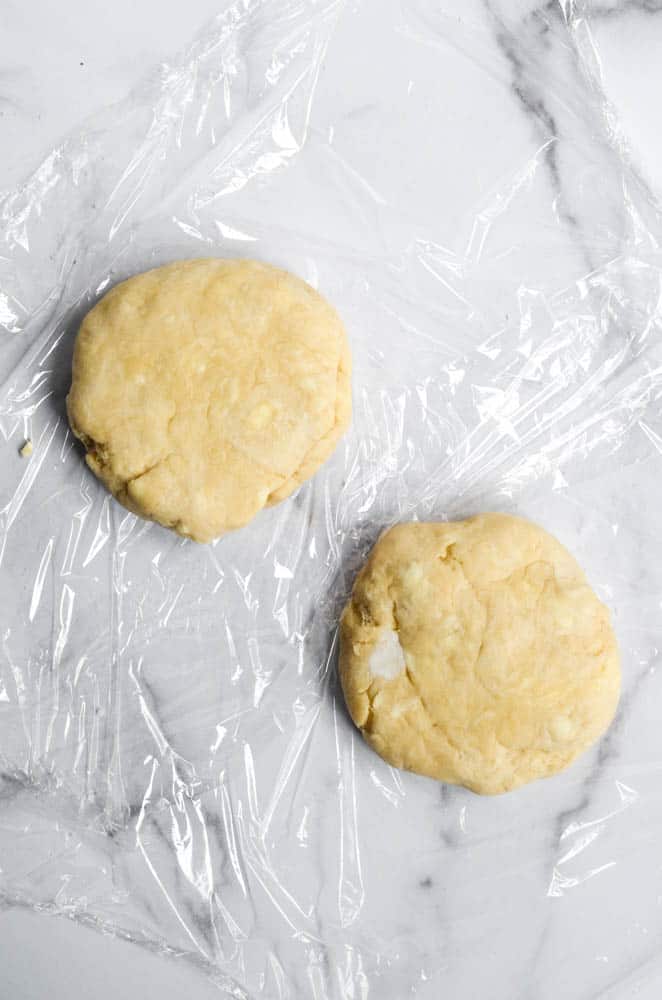
Step 2: Knead and divide dough. Chill.
Place dough on lightly floured surface and knead dough a few times to make sure all of the ingredients are combined. Roll dough into one big ball, flatten ball, and divide the dough into two equal pieces. Flatten both balls of dough until they form discs about 1" thick and wrap both discs tightly in plastic wrap. Place in the refrigerator to chill for at least 30 minutes (but preferably 2 hours).
Step 4: Form your crust.
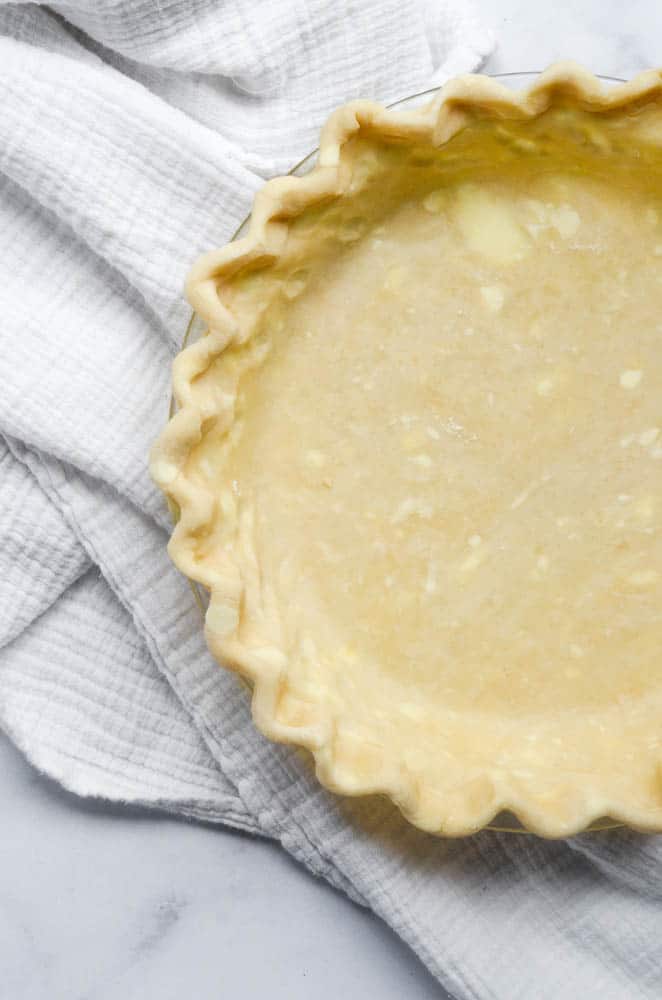
When you're ready to use the dough, roll out dough on a lightly floured surface until very thin (about ⅛" thick). Drape dough over the pie dish, cutting away any extra dough that's more than 1 ½" long from the edge. Roll up edges and make any design you want (see below for ideas).
Making the Pie Crust in Advance
You can stick the dough in the freezer for 6-8 weeks, too, if you're not ready to use it right away. Just take it out of the freezer and place in the refrigerator the night before you want to use it.
Once made, you should use this refrigerated dough within 4-5 days of making.
Butter Pockets are Perfect
One of the biggest tips I have to make pie crust that's perfectly buttery and flaky is not to be scared of the butter or shortening pockets. They're there because your butter was cold and you didn't over process the dough. Don't worry if you have several places that just look like straight butter! This is the key to that buttery goodness.
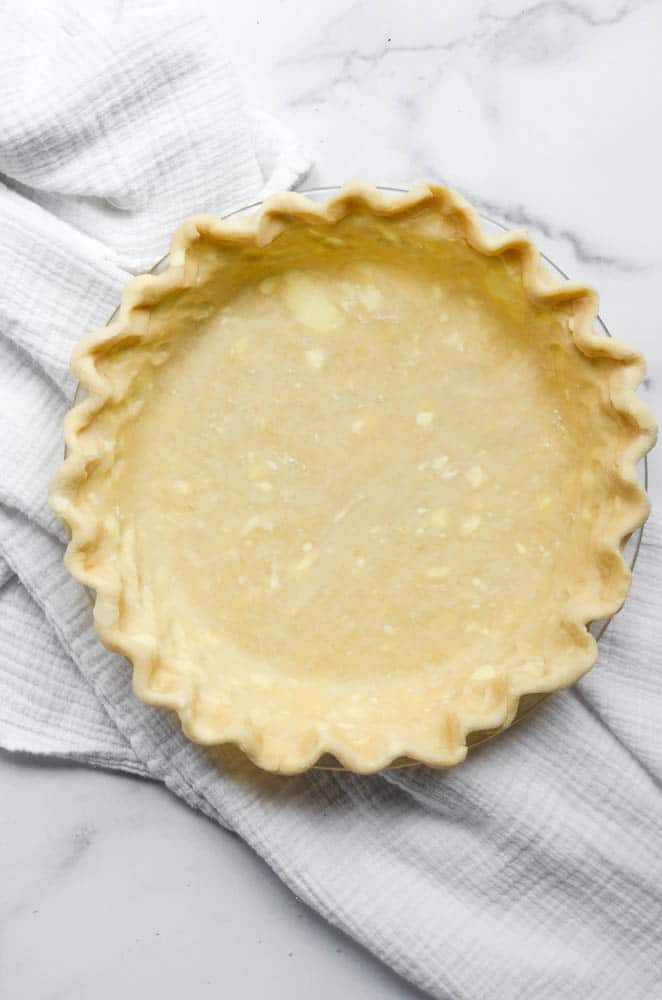
Making Pretty Edges of Pie Crust
Once you've rolled up the rest of the dough to create a thick border of pie crust around the circumference of your pie plate, you can do any number of designs.
9 out of 10 times, you'll find me crimping the edges of my pie crust (the first demonstration on the linked video) because it's easy once you get some practice and looks like you spent more time on it than you did. You basically use your index finger and thumb to hold the edges in place while your thumb presses in the opposite direction, making a nice crimp. Just like my hair in middle school.
Now You Need Things to Make with Your Pie Crust
Look no farther. Here are some of my favorite recipes using this pie crust:
- Tomato and Goat Cheese Galette is easy, delicious, and has everyone raving about it.
- John's Blueberry Pie (recipe coming soon)
- Sausage, Asparagus, and Mushroom Quiche is one of my favorite breakfast, brunch, or dinner meal and something we've been eating a lot of lately.
- These Mushroom, Onion, and Spinach Galettes are so good for breakfast!
- These Easy Beef Empanadas are deliciously simple and a fun way to mix it up!
xox
kathryn
As always, if you make anything from the blog, be sure to let me know! I love hearing from you in the comments on this post below or find Worn Slap Out on Facebook, Instagram, or Pinterest!

Perfectly Easy Pie Crust from Scratch
Ingredients
- 2 ½ cups all purpose flour
- 1 ½ teaspoon salt
- 6 tablespoon unsalted butter chilled and cut into cubes
- ¾ cup vegetable shortening cut into small cubes
- ½ cup ice water
Instructions
- Place all ingredients in a food processor (except for ice water). Pulse a few times until ingredients are combined. Slowly add in ice water and pulse a couple more times until all combined.
- Place dough on lightly floured surface, kneading dough just a few times to make sure all the flour is combined. Roll dough into a flattened ball and divide dough into two equal pieces. Roll out both pieces into a ball, then flatten until dough forms a disc no more than 1" thick.
- Place in the refrigerator to chill at least 30 minutes (preferably 2 hours) before using.
- When you're ready to use the dough, roll dough on a lightly floured surface until very thin (about ⅛" thick). Drape dough over the pie dish, cutting away any extra dough that's more than 1 ½" long from the edge. Roll up edges and crimp edges.


Comments
No Comments